I've been working doing a lot more with Azure Web Apps lately and found that there are some basic things that it's hard to find information on. So I decided to write some labs. This is the fifth post in a series.
The overall goal of these labs is to teach you how to create an application that runs inside of an Azure Web App. While this isn’t all that difficult, there are a fair number of steps. This fifth lab will take our sample application and convert it over to use claims-based authentication. We’ll also explore how to use Azure App Authentication’s (aka. Easy Auth’s) /.auth/me service endpoint to retrieve more detailed information about the currently authenticated user.
So far in this series of labs, you’ve got an ASP.NET Core app that uses policies, requirements, and handlers to do authorization checks. At the API level, ASP.NET Core’s identity and authorization logic is focused on claims-based identity. At present, our sample application is not using claims-based authentication. Not using claims-based auth isn’t holding us back too much at the moment but ultimately, we’ll want to use claims-based auth because it’s a lot more flexible and it’s the way that most modern security frameworks are constructed.
Here's a link to the PDF version of this lab.
Here are the labs in this series: Lab 1, Lab 2, Lab 3, Lab 4, Lab 5
Terminology
The Portal uses a user interface concept that tends to expand horizontally towards the right. Every time that you choose something, rather than popping open a dialog box, it creates a new panel of in the user interface. These panels are called blades. I’ll be referring to UI blades through this lab.
Variables
A lot of the resources that you create in this lab are going to need unique names. When I say unique, I mean that they’re going to need to be unique for Azure and not just fun and creative. Since I can’t possibly know which values that you’re going to need to choose, I’m going to give you the list of these values now and let you choose them. I’ll refer to these as “variables” throughout the lab and when I refer to them, I’ll put them in squiggle brackets like this – {{Variable Name}}.
| Variable Name | Description | Your Value |
| {{App Name}} | This is the name of your application in Azure. This will eventually turn into the URL for your application. For example, if my App Name is ‘thingy123’ application URL that azure generates will be https://thingy123.azurewebsites.net. | |
| {{Resource Group}} | This is the name of the Azure resource group. | |
| {{App Service URL}} | This is the URL for your web app. This value is generated for you by Azure. | https://{{App Name}}.azurewebsites.net |
Source Code
You can download the source code for this lab from uploads/benday-azure-web-app-code-lab5.zip
Open the Sample Solution & Publish to Azure
For this lab, you’re going to use a simple ASP.NET MVC Core application that’s in the zip file for lab 5. This code is very simple. It’s not much more than what you’d get if you created a new solution and ASP.NET MVC Core project.
- Locate the zip file for this lab.
- Extract the zip to a folder on your local disk (for example, c:\temp\azure-labs)
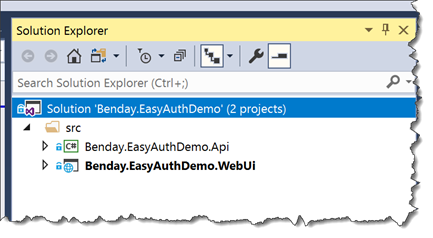
- In the before folder for this lab, open the EasyAuthDemo.sln solution using Visual Studio 2017. When it’s opened, you should see two projects in Solution Explorer.
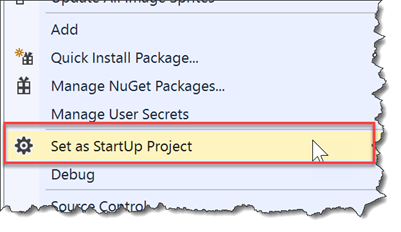
- Let’s make sure that the web project is marked as the start up project. In Solution Explorer, right-click on the EasyAuthDemo.WebUi project. From the context menu, choose Set as StartUp Project.
- Publish EasyAuthDemo.WebUi to your Azure Web Site by doing a Right Click --> Deploy.
- After the publish has completed, you should see a browser window with your published web app running on Azure. If you don’t see your application, open a browser and go to {{App Service URL}}.
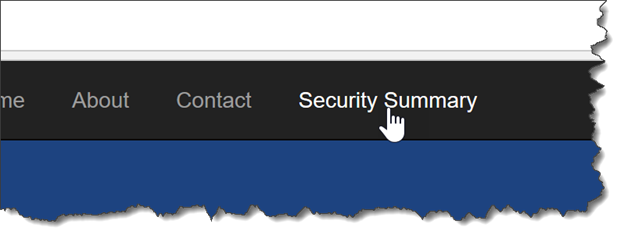
- In the menu bar of the web application, click the Security Summary link
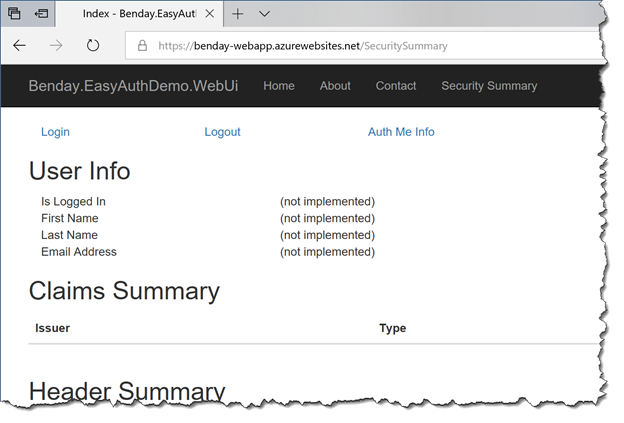
- You should see a page that looks like the following image.
This page of the application is the Security Summary page.
The Security Summary Page, Part 1: Authenticated User
The purpose of Security Summary is to quickly visualize what is happening related to security in the application. An important thing to point out is that this page doesn’t require you to be logged in and that’s helpful because, as a developer, you’ll need to see what’s happening with your application’s security for both authenticated users and non-authenticated users.
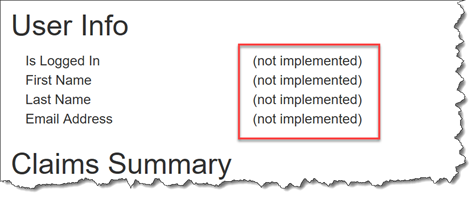
At present, this page is only partially implemented. We’ll implement all the missing stuff in this lab. The Security Summary interface is divided into sections: User Info, Claims Summary, Header Summary, and Cookie Summary.
- User Info isn’t implemented yet.
- Claims Summary is implemented by the application itself isn’t configured to use claims so that section of the UI is empty.
- Header Summary is fully implemented and shows you all the headers and header values that were on the last HTTP request.
- Cookie Summary is implemented and shows you all the cookies that were on the last HTTP request.
Let’s take a tour of the Security Summary page.
- At the top of the Security Summary page, click the Login Log in using your Microsoft Account and navigate back to the Security Summary page.
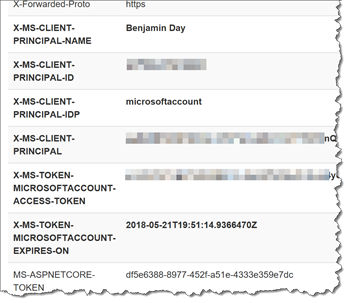
- Locate the Header Summary section of the user interface. Scroll down through the headers values until you get to the values that start with “X-MS-“. Those headers should be in bold letters.
Azure App Authentication (Easy Auth) HTTP Headers
You should see a bunch of headers in bold letters such as X-MS-CLIENT-PRINCIPAL-NAME, X-MS-CLIENT-PRINCIPAL-IDP, and X-MS-TOKEN-MICROSOFTACCOUNT-EXPIRES-ON. These headers are injected into your HTTP Request by Azure App Authentication security.
- X-MS-CLIENT-PRINCIPAL-NAME contains the human-readable name of the current user or the username of the current user.
- X-MS-CLIENT-PRINCIPAL-IDP contains the name of the identity provider that was used to authenticate this user. In this case, it’s microsoftaccount meaning that we used a Microsoft Account (MSA) to create this session.
- X-MS-TOKEN-MICROSOFTACCOUNT-EXPIRES-ON tells us when the security token will expire.
The value that you see for X-MS-CLIENT-PRINCIPAL-NAME depends on the settings you configured in the in the Azure Portal for your Web App’s Microsoft Account Authentication Settings section.
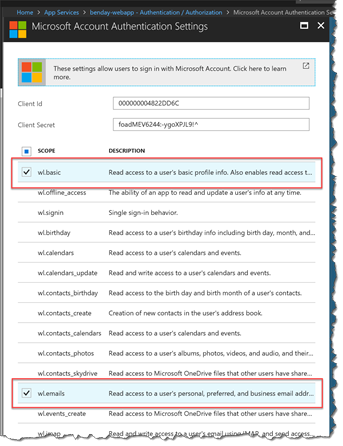
If you set Microsoft Account Authentication Settings to wl.basic, then the X-MS-CLIENT-PRINCIPAL-NAME value will be a human-readable name (for example, “Benjamin Day”). If you set Microsoft Account Authentication Settings to wl.basic plus wl.emails, then the X-MS-CLIENT-PRINCIPAL-NAME value will be the MSA account user id for the current user (for example, “benday@live.com”).
If you have your application set to only request wl.basic from the user, then you won’t be able to see his/her email address.
Verify That Your Application is Configured for wl.basic and wl.emails
- Open a new tab in your browser and navigate to https://portal.azure.com
- Under App Services, navigate to the configuration page for you Azure Web App {{App Name}}.
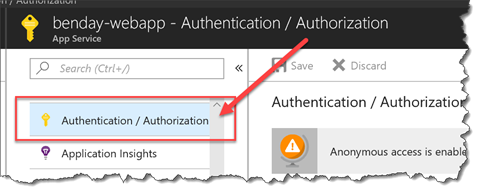
- Click on Authentication / Authorization
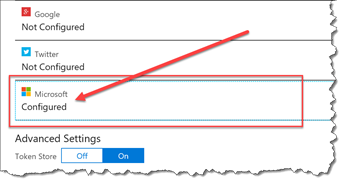
- Under Authentication / Authorization, click on Microsoft
- Verify that basic and wl.emails are both checked.
At the bottom of the blade, click the OK button.
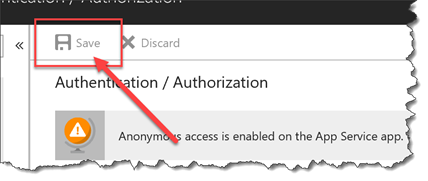
If you made changes on the previous blade, click the Save (NOTE: if you didn’t make any changes, this button will be greyed out.)
- In your browser, go back to the Security Summary tab.
The Security Summary Page, Part 2: The /.auth/me Service Endpoint
You should be back on the Security Summary page. Azure Easy Auth has a service endpoint with the address of /.auth/me. The /.auth/me service lets you access a JSON string with all the information that Azure App Authentication knows about the current user.
- Scroll up to the top of the page.
- At the top of the page, click on the Auth Me Info link.
- You should now be on a new tab and you should see a bunch of JSON data.If you got an empty JSON string or got an access denied message, go back to the Security Summary, click and click on Login. After you’ve logged in, click on the Auth Me Info link again.
This large block of JSON is what Azure Easy Auth knows about you. The especially important stuff is in the JArray named user_claims. Since Azure Easy Auth works using claims-based identity, all these pieces of info come through as individual name-value pairs. Each of these name-value pairs is called a claim.
[ { "access_token": "token-redacted-for-security-reasons", "expires_on": "2018-05-21T20:06:47.754206Z", "provider_name": "microsoftaccount", "user_claims": [ { "typ": "http://schemas.xmlsoap.org/ws/2005/05/identity/claims/nameidentifier", "val": "66759c6053a12290" },{ "typ": "http://schemas.xmlsoap.org/ws/2005/05/identity/claims/emailaddress", "val": "benday@live.com" }, { "typ": "http://schemas.xmlsoap.org/ws/2005/05/identity/claims/name", "val": "Benjamin Day" }, { "typ": "http://schemas.xmlsoap.org/ws/2005/05/identity/claims/givenname", "val": "Benjamin" }, { "typ": "http://schemas.xmlsoap.org/ws/2005/05/identity/claims/surname", "val": "Day" }, ... ], "user_id": "benday@live.com" } ]
If you look back on the Security Summary, you’ll notice that the Claims Summary section is empty.
Let’s fix that.
Populate User Claims using Custom ASP.NET Middleware
Ok. So let’s just quickly summarize where we’re at. We’ve got a Security Summary page in our app that can show us our claims and the HTTP headers for each request. We know that there’s information in the headers about the user if that user is logged in to Easy Auth. We also know that if the user is logged in then he/she can access the /.auth/me service endpoint to get JSON-formatted information about the authenticated user.
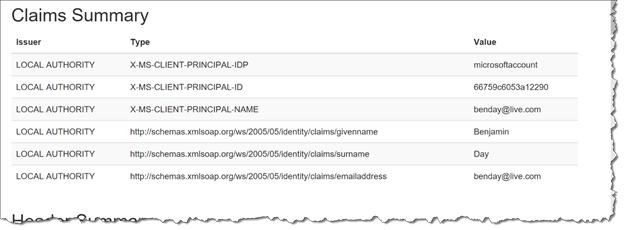
That /.auth/me JSON has some handy data in it that would be really nice to put on the screen and use in our app. Specifically there are claims for First Name (Given Name), Last Name (Surname), User Id, and Email Address.
So how come our claims are empty when we go to the Security Summary? Honestly, I’m not sure. If you were to do an application using Easy Auth and ASP.NET Classic (aka. not ‘Core’), those claims would be automagically populated for you. My guess is that because ASP.NET Core is still pretty new, that Easy Auth doesn’t fully 100% support ASP.NET Core yet.
For now, we’ll need to intercept the incoming HTTP Request and populate the claims. To do this, we’ll use a piece of custom middleware. Middleware is a piece of code that – uhmmm – sits in the middle of an HTTP request pipeline. It’s in the middle so therefore, middleware. Anyway, middleware has access to the execution context for the request and lets us do custom actions. There are several ways of writing middleware but the easiest and most type-safe way is to create a class that implements the Microsoft.AspNetCore.Http.IMiddleware interface.
In the sample application in the Security namespace, there is a class called PopulateClaimsMiddleware that, when called, populates the claims for the current user using header values and data from the /.auth/me service.
public class PopulateClaimsMiddleware : IMiddleware
{
 public async Task InvokeAsync(HttpContext context, RequestDelegate next)
 {
 List<Claim> claims = new List<Claim>();

 AddClaimsFromHeader(context, claims);
 AddClaimsFromAuthMeService(context, claims);

 var identity = new ClaimsIdentity(claims);

 context.User = new System.Security.Claims.ClaimsPrincipal(identity);

 await next(context);
 }

...
}
In the middleware code, some of the values come from the headers and some of the values come from the /.auth/me service. Ultimately, all the values get set on the User property of the current HttpContext so that it’s available throughout the rest of the request execution.
The code in AddClaimsFromAuthMeService() uses a class called AzureEasyAuthClient to make the service call to /.auth/me using the logged in user’s security token. The really important code in AzureEasyAuthClient is the code that grabs the AppServiceAuthSession cookie from the user’s HTTP Request and attaches that same cookie to the service call to /.auth/me. Passing that cookie along is how this HttpClient code authenticates with the /.auth/me service.
NOTE: theoretically, you can pass the token that’s inside of that AppServiceAuthSession cookie to the /.auth/me service using a header named ‘x-zumo-auth’. Unfortunately, I was unable to make that work and the documentation for Azure App Authentication (aka. Easy Auth) is practically non-existent.
private void TryInitializeHttpClientUsingSessionCookie(HttpRequest request)
{
 var requestCookies = request.Cookies;

 if (requestCookies.ContainsKey(SecurityConstants.Cookie_AppServiceAuthSession) == false)
 {
 IsReadyForAuthenticatedCall = false;
 }
 else
 {
 var handler = new HttpClientHandler();

 var client = new HttpClient(handler);

 var baseUrl = $"{request.Scheme}://{request.Host}";

 client.BaseAddress = new Uri(baseUrl);

 var container = new CookieContainer();

 handler.CookieContainer = container;

 var authCookie =
 requestCookies[SecurityConstants.Cookie_AppServiceAuthSession];

 container.Add(
 new Uri(baseUrl),
 new Cookie(
 SecurityConstants.Cookie_AppServiceAuthSession,
 authCookie));

 IsReadyForAuthenticatedCall = true;

 _Client = client;
 }
}
Also in the Security namespace, there’s a class called ExtensionMethods.cs. This class has a method in it called UsePopulateClaimsMiddleware(). This method has the logic to hook the middleware into the ASP.NET Core execution pipeline.
public static class ExtensionMethods
{
 public static IApplicationBuilder UsePopulateClaimsMiddleware(
 this IApplicationBuilder builder)
 {
 return builder.UseMiddleware<PopulateClaimsMiddleware>();
 }

...
}
Enabling Our Middleware in ASP.NET Core
Let’s hook the middleware into the application.
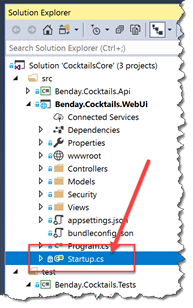
- In Visual Studio, go to Solution Explorer. In the web project, locate Startup.cs and open it.
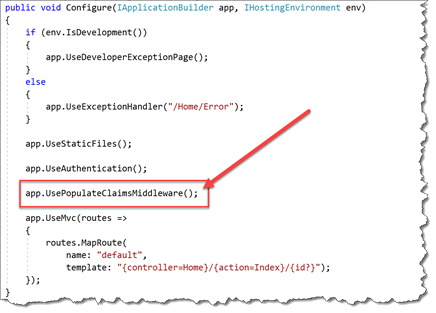
- In the editor for **Startup.**cs, locate the Configure() method.
- Uncomment the line that says app.UsePopulateClaimsMiddleware();
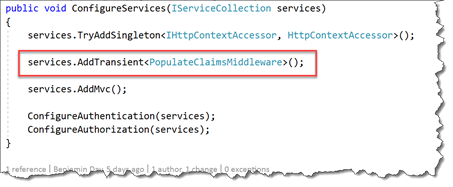
- In the editor for Startup.cs, locate the ConfigureServices() method.Add the following line to ConfigureServices() as shown below: services.AddTransient
();
Compile the solution.
Deploy the web application to your Azure Web App using Right-Click --> Deploy.
In the browser, go to Security Summary.
Verify that Claims Summary is now populated with claims.NOTE: if Claims Summary is still empty, click the Login button at the top of Security Summary and log back in.
Ok. We’ve got the middleware hooked in and we’re populating the user’s claims.
But we’re not doing anything useful with them. Let’s use claims to populate the User Info section of the Security Summary.
Modify SecuritySummaryController to Access IUserInformation
If we want to access the user’s claims, they’re available to us by accessing the User property on HttpContext or via the User property on the ASP.NET Controller base class. Now we could access the claims directly but if we want to keep our code clean, it’s often a good idea to create a separate class that knows how to access those claims. There’s already a interface named IUserInformation and a class named UserInformation in the sample application. Let’s hook that in to the SecuritySummaryController code.
- In Visual Studio, open SecuritySummaryController.cs
- At the top of the SecuritySummaryController class, add the following using statement:usingEasyAuthDemo.WebUi.Security;
- In the class itself, add the following code in italics.
public class SecuritySummaryController : Controller
{
 private IUserInformation _UserInfo;

 public SecuritySummaryController(IUserInformation userInfo)
 {
 if (userInfo == null)
 {
 throw new ArgumentNullException(nameof(userInfo),
 $"{nameof(userInfo)} is null.");
 }

 _UserInfo = userInfo;
 }

...
}
- Locate the PopulateUserInfo() method
- Change the code in the PopulateUserInfo() method to the following code:
private void PopulateUserInfo(SecuritySummaryViewModel model)
{
 model.IsLoggedIn = _UserInfo.IsLoggedIn.ToString();
 model.FirstName = _UserInfo.FirstName;
 model.LastName = _UserInfo.LastName;
 model.EmailAddress = _UserInfo.EmailAddress;
}
- Open Startup.cs
- Locate the ConfigureServices()
- Add the following code to the ConfigureServices()
public void ConfigureServices(IServiceCollection services)
{
 services.TryAddSingleton<IHttpContextAccessor, HttpContextAccessor>();

 services.AddTransient<PopulateClaimsMiddleware>();

 services.AddTransient<IUserInformation, UserInformation>();

 services.AddMvc();

 ConfigureAuthentication(services);
 ConfigureAuthorization(services);
}
- In the Security namespace, locate and open UserInformation.cs
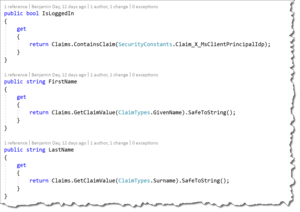
The UserInformation class has all the logic for accessing the current user’s claims and getting the values for the desired claims. It’s also got logic to make sure that it safely handles when the user is not logged in and/or a desired claim does not exist in the user claims collection. Having this logic wrapped into it’s own class makes the code a lot less error-prone and keeps the logic for reading claims very clean and organized.
Here’s a piece of advice. Accessing claims can become a coding nightmare. Do yourself a favor and keep your code organized. More importantly, watch out for duplicate code!
- Compile the solution
- Deploy the updated version of the app to Azure using Right-click --> Deploy.
Verify User Info Is Being Populated from Claims
The updated version of the app should be deploy to Azure. Let’s verify that we’re reading the claims info and putting it up on the screen.
- In a browser, go to {{App Service URL}} to view your app
- Go to the Security Summary
- Make sure that you’re logged in
- Locate the User Info section
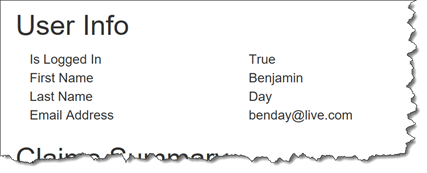
- Verify that User Info is being populated with your information.
If the user info section is populated, you’re done!
Summary
Here’s a quick summary of what we did.
We wanted to use Azure App Authentication (aka. Easy Auth) with ASP.NET Core and claims-based authentication. In order to do this, we added a piece of custom middleware that plugged into the ASP.NET Core request pipeline and populated the authenticated user in HttpContext. Once we did that, we used a utility object to access the user’s claims and display them on the page in the Security Summary.
Congratulations! You’ve got claims-based authentication working with an Azure Web App and ASP.NET Core.

