Ok. Part 3 of the Scrum with GitHub Projects series. In the last post, I showed you how to create a Project. In this post, we'll start using the requirement management features of that new project.
By the way, I'm also doing a video series on Scrum with GitHub Projects on YouTube. If you want to watch the video version of this post, it's available here.
So in this post, I'm going to show you how to start populating your project backlog with requirements.
And while we're doing this, I'll show you how to prioritize your work.
This post will be the basic mechanics of using the backlog features. I'll get into the details of Product Backlog Refinement and how to keep your requirements backlog up to date in a later post.
Where does this fit in the Scrum Framework?
As a reminder of how the product backlog fits into the overall scrum process, here's the scrum framework diagram. The product backlog is this first box right here. It's the list of all the things you might ever do as part of your project.
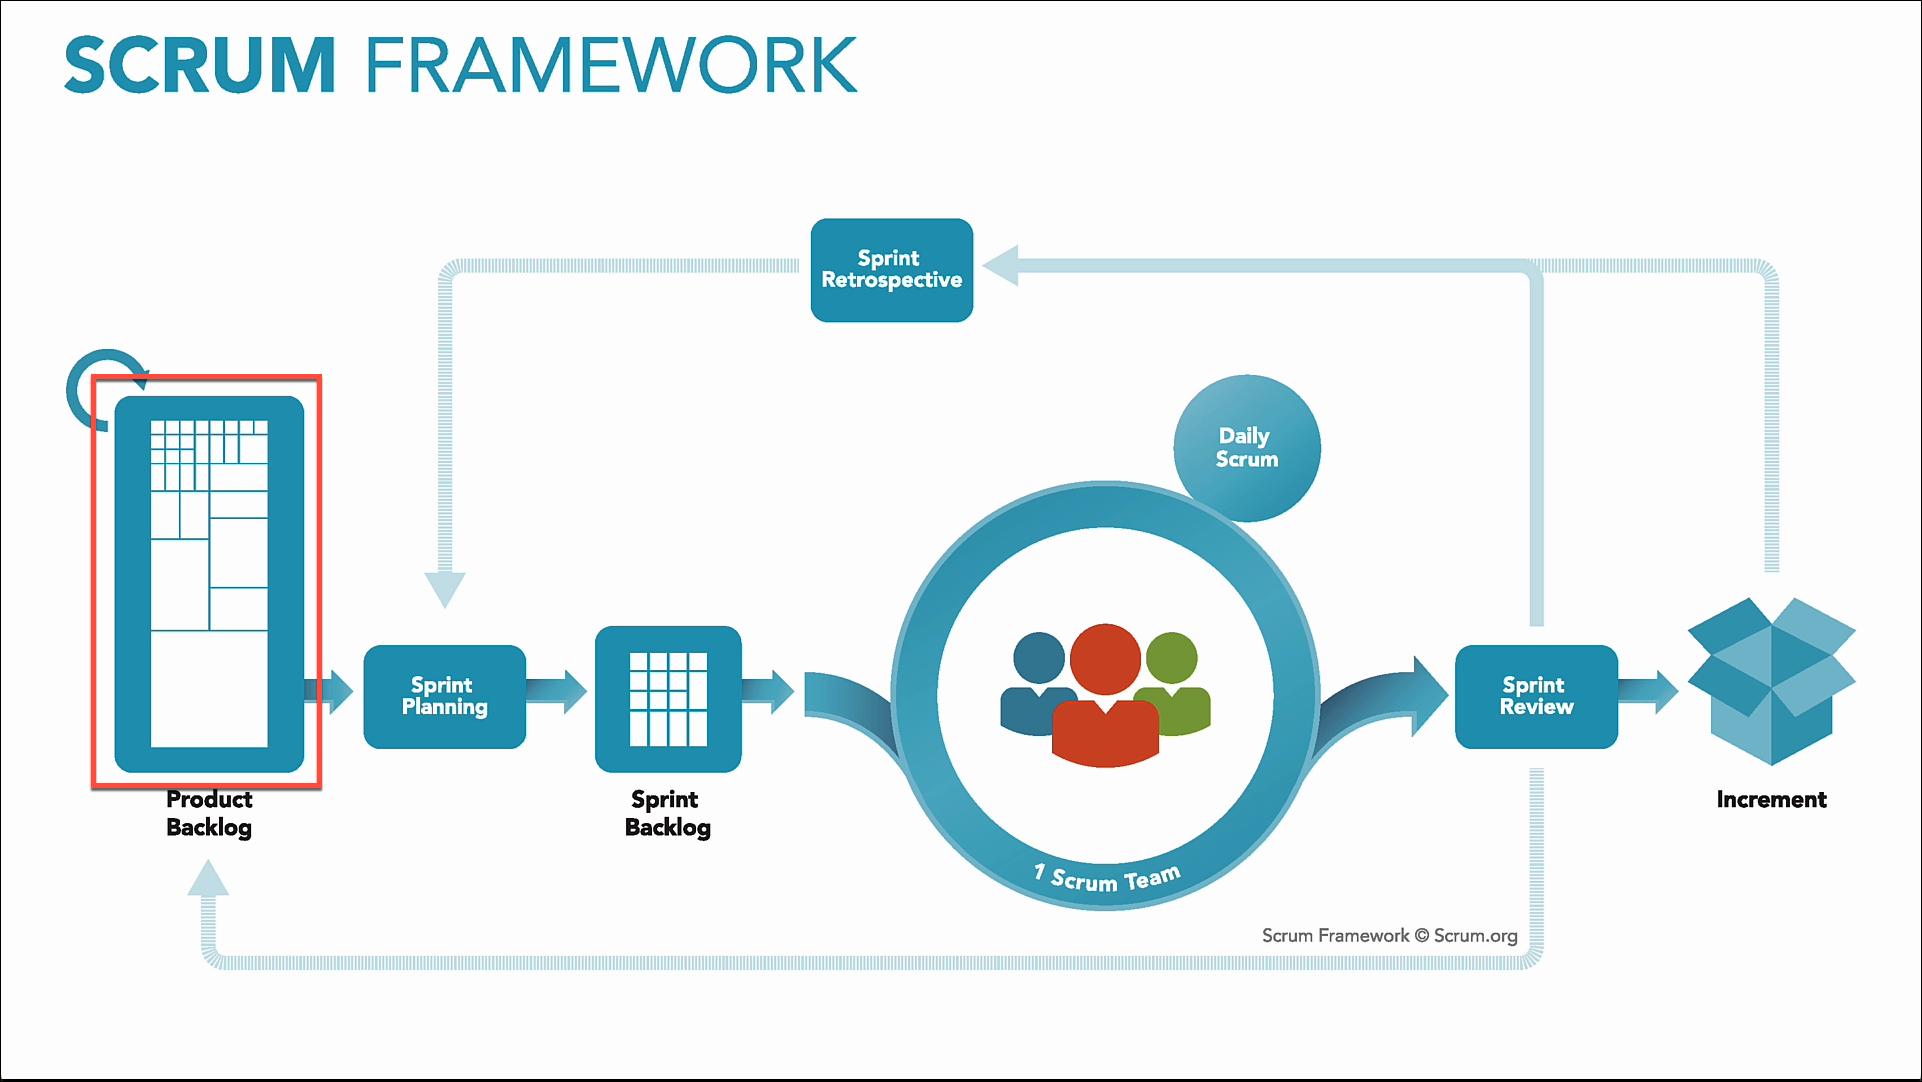 *The Scrum Framework: Product Backlog*
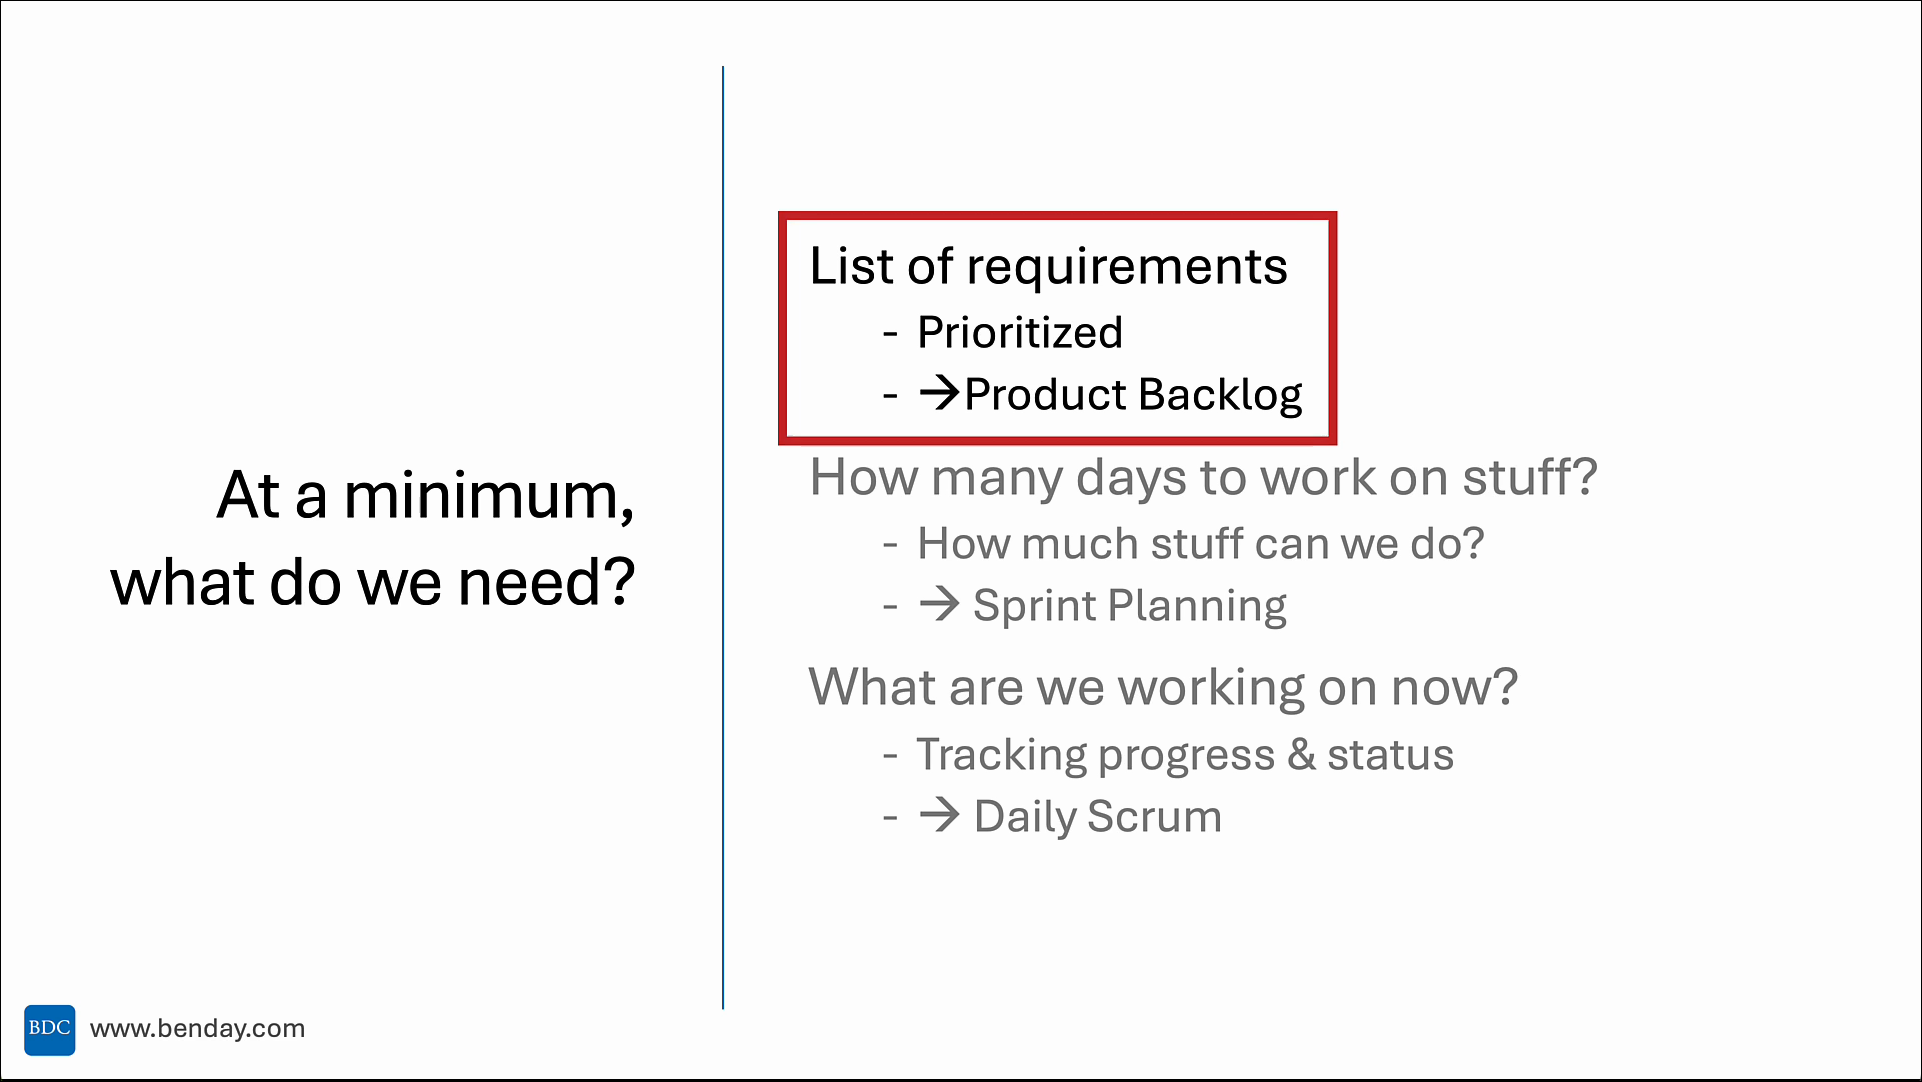
Thinking about the essential activities that we're trying to map into GitHub Projects, we're trying to get our list of prioritized requirements.
In scrum, this is presented by the Product Backlog. It's the Product Owner's vision for which features should be delivered and all the features that are being considered for future delivery. The items towards the top of the product backlog are the highest priority and the items towards the bottom are the lower priority items.
 *How do we map GitHub Project features to Scrum?*
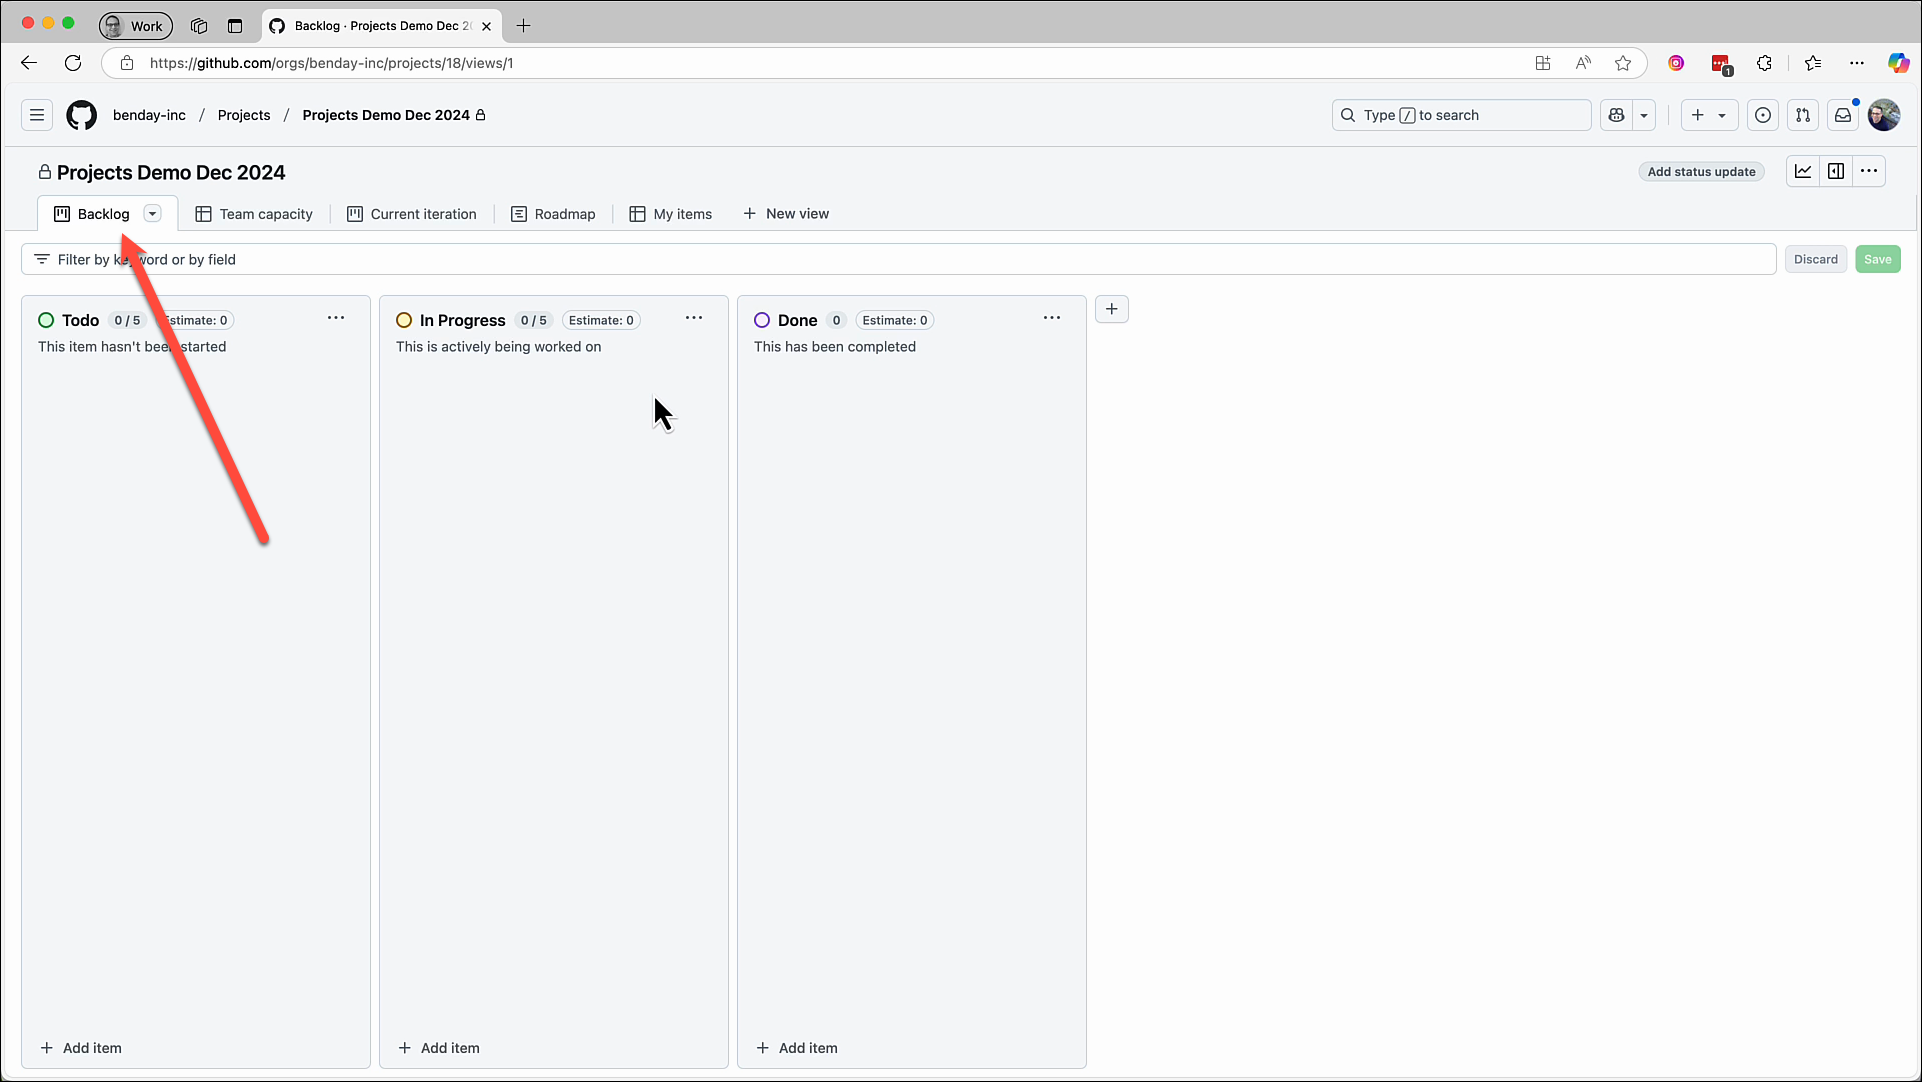
GitHub Project's Backlog View
ok. so here we are on GitHub in a web browser. And we've got the project opened that we created last time.
Currently the view is set to "Backlog". I'd probably call this a "Kanban board" view though. But this screen does give us an overview of the requirements in our backlog.
When I think of a typical backlog view, I'd be thinking about seeing a list of items.
 *Backlog View in GitHub Projects*
To get to that more traditional backlog view, we can come over here to this little dropdown menu on the backlog tab.
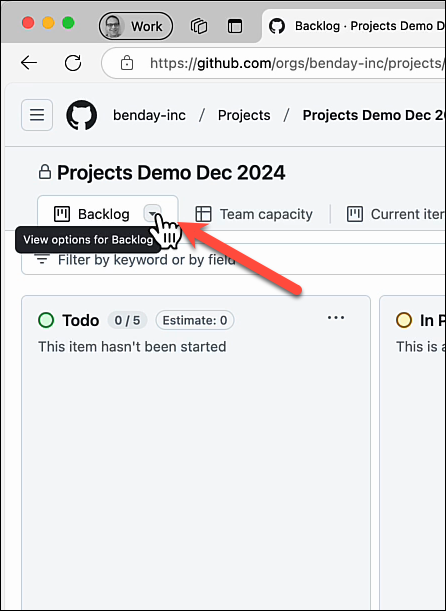 *The options menu for the Backlog view*
Clicking this brings up a context menu with a bunch of options for how we see the stuff in our backlog. I want to see this backlog data -- the list of our requirements -- in list form. To get that, you can change the layout to "Table".
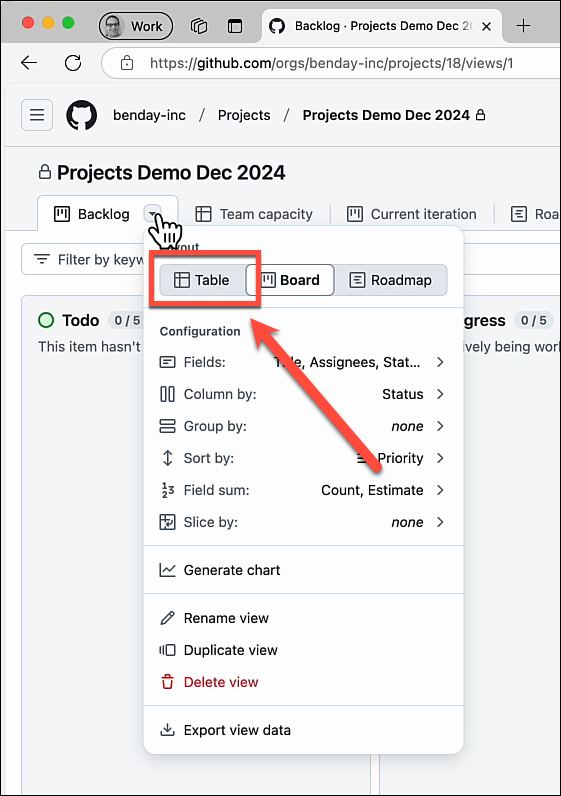 *From the options menu, change the Layout to 'Table'*
Add New Items to the Product Backlog
Now that we have the Backlog View looking more like a traditional list of requirements, we can start -- well -- adding new requirements. To do that, there's a helpful keyboard shortcut for adding new items: Control-Space. You can also just click the "plus" button to create a new item.
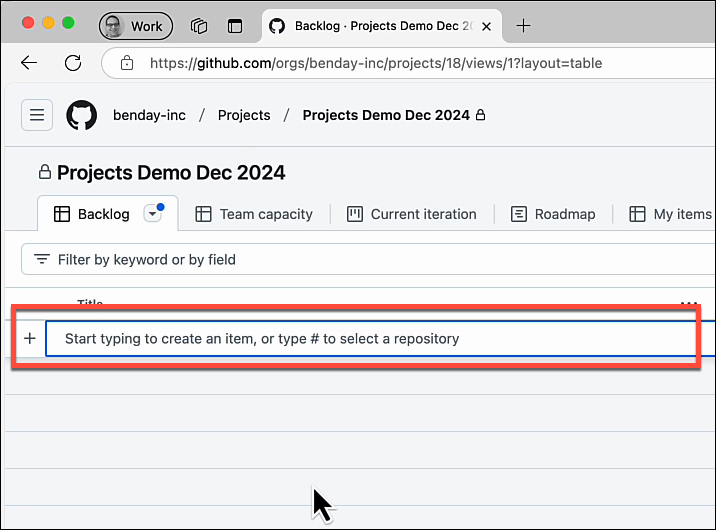 *Add a new item by typing in the input box*
This puts us into edit mode and now we can type in the title for our first requirement. I'm going to call it Product Backlog Item A. And when i'm done, i'm going to press Enter.
By the way, in Scrum, requirements on the product backlog are typically called "product backlog items" or PBI's. Although it's not unusual to hear teams call them user stories or requirements. Whatever you call them, the idea is that they're a piece of functionality that you might deliver as part of the product that you're working on.
I'm going to create a handful more PBIs and at this point the backlog should look something like the screenshot below. So 5 requirements. 5 product backlog items. Your product backlog in real life will probably be a lot more than just 5 items but this is enough for now to start showing you some more stuff that you can do.
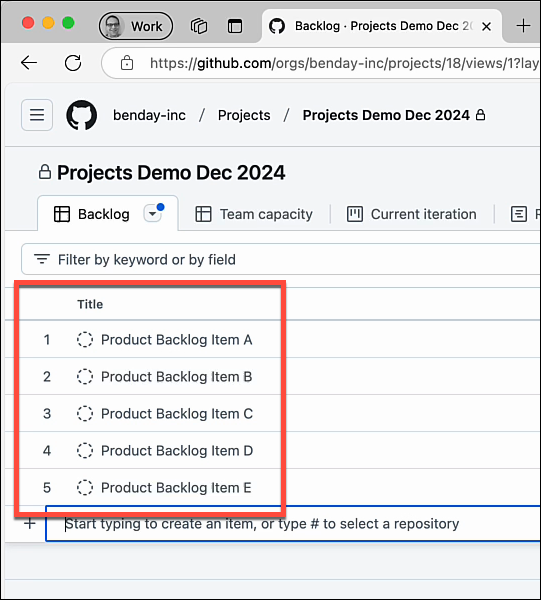 *The newly created Product Backlog Items*
Assigning Work
Once you've created the PBIs in your backlog, there are lots of things you can do with them.
If you want to assign work to someone, you can come over to the Assignees column and click on the dropdown item link.
This brings up a context menu that let's you search for people who are part of your organization. The two suggestions that come up are for me and for my friend Mickey Gousset. If you haven't checked out Mickey's youtube channel, you should. He works for GitHub and has A WHOLE LOT of great GitHub content.
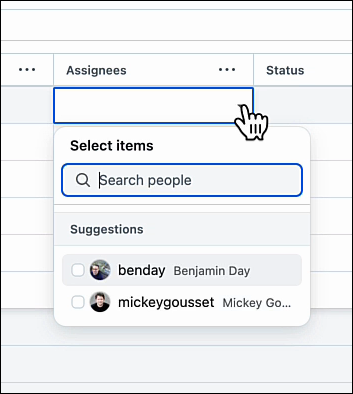 *The Assignees menu lets you distribute work to people*
Status of Work
The next column is for editing the "Status" for requirements. The default status values are "To Do", "In Progress", and "Done". "To Do" means that the work hasn't started yet. "In Progress" means that it's being worked on. And "Done" means that the work has happened and completed.
These options are pretty basic and I'm going to guess that a lot of you are looking at these values and thinking that you'd like to add some more status values. You can definitely add more and I'll show you how in a future post.
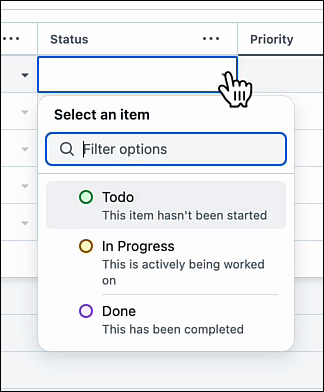 *Set the Status value for a PBI*
Priority of PBIs
Next is priority. I don't especially love this field because I think its confusing.
In my mind, these values are more like categories of prioritization. Probably representing something like how important are these items to the business. These values are not how I'd generally handle the relative priority of one PBI versus another PBI. Mostly because these values just aren't granular enough.
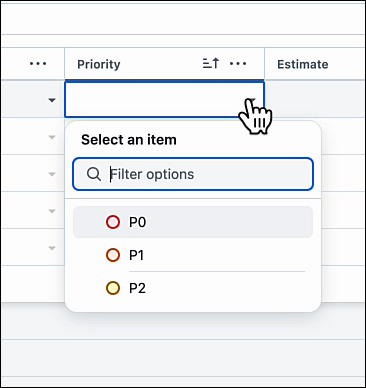 *The Priority editor for a PBI*
I'll show you how I'd do prioritization of PBIs in just a moment.
Estimation: PBI Estimate & Size Values
The next two columns in the editor are "estimate" and "size". I'm going to skip over the Estimate field for now (I'll come back to it shortly) and start with the Size column.
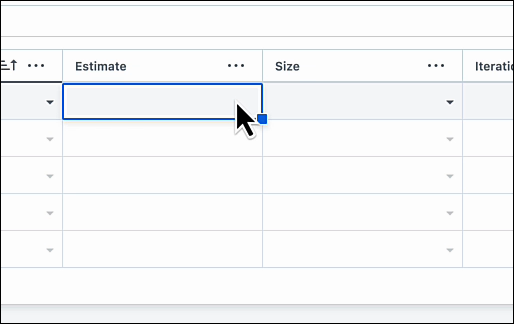 *The Estimate and Size values for a PBI*
These values are meant to be the rough size estimate -- rough level of effort -- for your product backlog items. By default this uses "t-shirt size" values: Extra small, small, medium, large, and extra large.
 *The default values for the Size column: XS, S, M, L, and XL*
I don't love this Size column and I don't think it's going to be all that useful on a data-focused Scrum team. More on that when I drill into the details of the Estimate column.
I think the Estimate column is going to be more interesting and useful to your team. It's a numeric value for storing things like Story Point values and/or Remaining Work values. Since this post is just trying to give an overview of the features, that's all I want to say about Size and Estimate for right now. I'll cover these two columns in A LOT more detail in a future post.
Scheduling Work using Iteration
And then the last column is "Iteration". Iteration is a scheduling value. The intent is to say when a PBI is getting worked on. In Scrum, this means which "Sprint" the work is scheduled for.
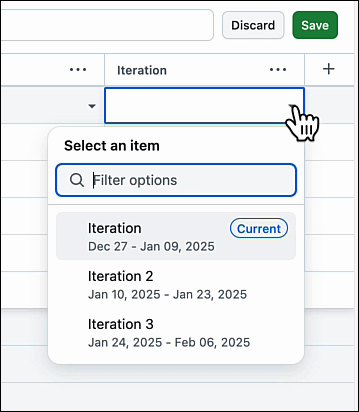 *Schedule work using Iterations*
I'd typically only set this value when I know for a fact that the work is getting done. Usually that'd be in the Sprint Planning Meeting. I'll cover the Sprint Planning Meeting in an upcoming post.
Summary
Ok. So we have 5 PBIs on our backlog and I've given you a quick tour of the default columns/values for these items. But so far we only have the titles. In the next post, I'll cover how you can add more detail to your PBIs -- basically, adding detail to your requirements.
Stay tuned.
-Ben
-- Looking for help adopting GitHub Projects for your team or your company? Need an assist getting going with GitHub Actions for automated builds and releases? Want to move your stuff over to GitHub from another service? We can help. Drop us a line at info@benday.com.