UPDATED (May 16, 2016) -- If you're looking for how to do this with ASP.NET Core, here's the ASP.NET Core 1.0 version.
UPDATED (June 13, 2014) -- With the latest version of the ASP.NET Identity / OWIN libraries and code, the Redirect URL value that you'll use in Step #8 should now be "http://www.mysampleapp.com/signin-microsoft". If you're getting an error that says Invalid redirect_uri value and you've just recently created the project, this is probably what's going wrong.
I’ve been playing with ASP.NET and social identity providers lately. The samples are all focused on using either Facebook authentication or Google authentication and the documentation for how to use a Microsoft Account is pretty thin. When I started working on it, it was unclear where I needed to go and what I needed to do to make it work on my development machine. The error messages were vague, too.
Eventually, I got it working and here’s the walkthrough on getting it working with Visual Studio 2013.
Step #1: Create a Project
Open Visual Studio 2013. Click New Project. Choose ASP.NET Web Application as the project type. Give it a name for the project and the solution. Click OK.
Step #2: Create the MVC Project
You’ll see a dialog that says “New ASP.NET Project”. Choose MVC. Make sure that the Authentication value is set to Individual User Accounts. Click OK.
Step #3: Open Startup.Auth.cs
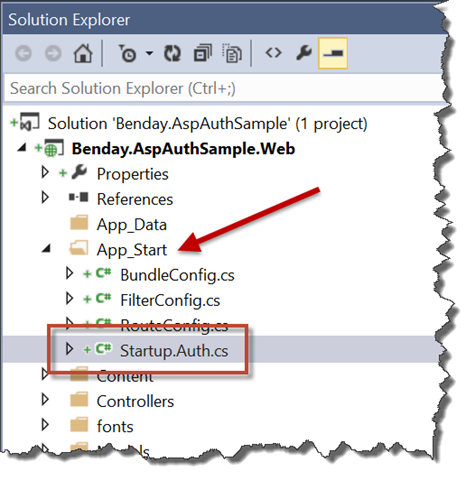
The settings for the user authentication providers for your ASP.NET MVC project are stored and specified in the Startup.Auth.cs file. In Solution Explorer, go to the ASP MVC project and expand the App_Start folder. Double-click the Startup.Auth.cs file.
Step #4: Enable Microsoft Account Authentication
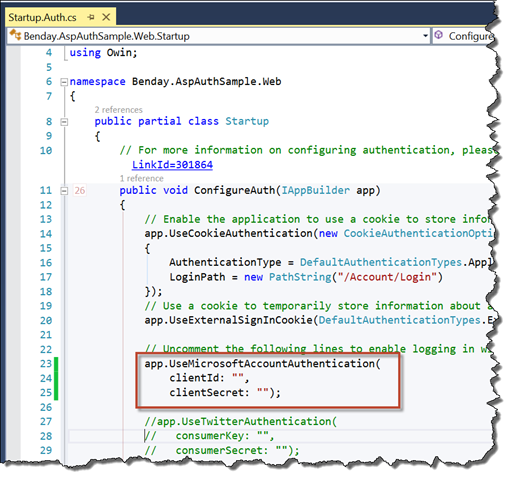
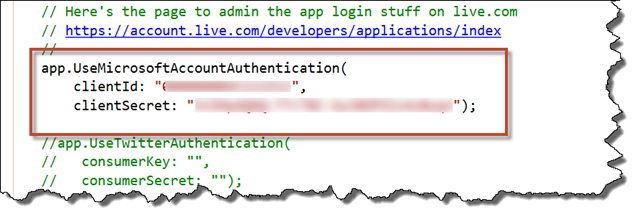
Startup.Auth.cs should now be open. Locate the line that says app.UseMicrosoftAccountAuthentication. That line is commented out by default. Uncomment that line so that it looks like the screenshot below.
Step #5: Create a Client ID and Client Secret for Microsoft Authentication
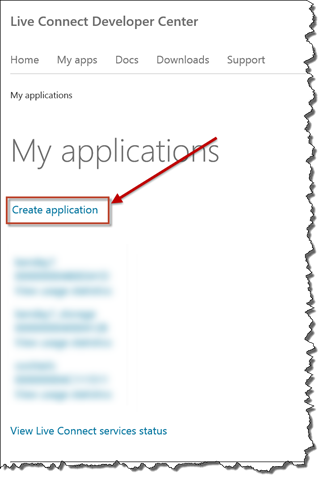
At the moment, the clientId and clientSecret parameter values are blank. You need to get these values from the Live Connect Developer Center. You can get it it by going to this link: http://go.microsoft.com/fwlink/?LinkID=144070 Log in to this site using your Microsoft Account (aka your Live ID). You should eventually end up at the My Applications page (https://account.live.com/developers/applications/index). Click on the Create application link to start the process of creating an application.
Step #6: Create the Application on Live Connect Developer Center
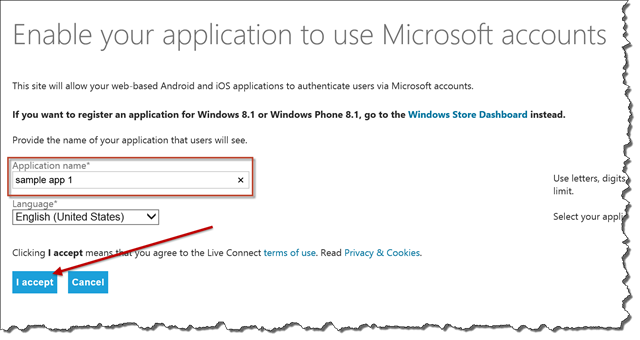
Add a value for Application name and click the I accept button.
Step #7: Save the basic settings
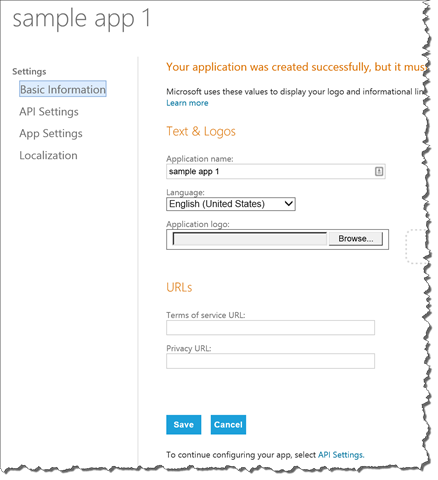
You should now see a screen that looks like the screenshot below. Optionally, you can add an application logo, terms of service url, and privacy url. Populate these values if you want to. Click the Save button.
Step #8: Populate the API Settings
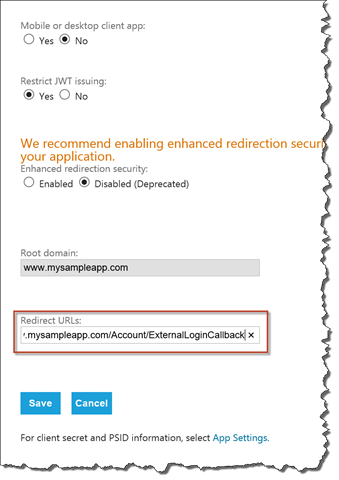
Click the API Settings link in the left column of the screen. You should now be on a screen that looks similar to the screenshot below. You need to populate the Redirect URLs textbox. When a user logs in to your app successfully, the Microsoft Account service will redirect them back into your application. The Redirect URL value is URL in your app where they’ll be sent. In this sample, we’re going to say that our domain name is www.mysampleapp.com. Don’t worry. You don’t have to actually register this domain. I’ll walk you through how to make this work all entirely on your development machine later in this post. Set the Redirect URLs text box to http://www.mysampleapp.com/Account/ExternalLoginCallback and click the Save button.
UPDATE (June 13, 2014) -- With the latest version of the code, the Redirect URLs value has changed. If you're getting an error when you run the app that says invalid redirect_uri, then you should change this value to http://www.mysampleapp.com/signin-microsoft.
Step #9: Activate & Copy App Settings
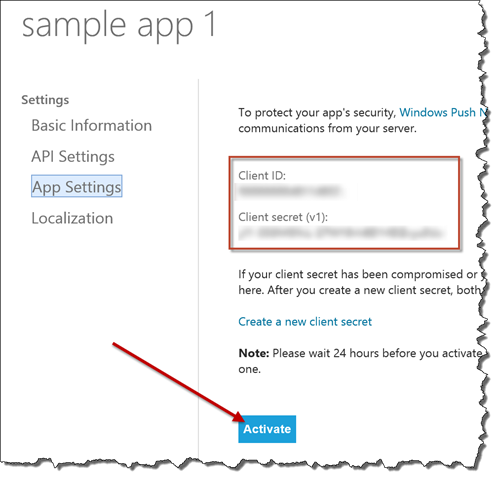
In the left column, click the App Settings link. You should now see a screen that looks similar to the one below. This screen shows you the Client ID and Client Secret values that you’ll be adding into your ASP.NET MVC application’s Startup.Auth.cs file. Click the Activate button. If you’re prompted, to activate new client secret, click OK.
Step #10: Add Client ID and Client Secret values to Startup.Auth.cs
Leave the browser window open and go back to the Startup.Auth.cs file in Visual Studio 2013. Plug the clientId and clientSecret values from the browser into the call to UseMicrosoftAccountAuthentication in Startup.Auth.cs.
Step #11: Make it work on your development machine
At the moment, if you run this, it’s going to fail because the redirect url points to a bogus domain name that doesn’t DNS resolve to your development machine’s address. You can fix this by editing the Windows hosts file. This file overrides the DNS resolution for addresses that you specify. The file is located in c:windowssystem32driversetc. (NOTE: there is no file extension on the hosts file.)
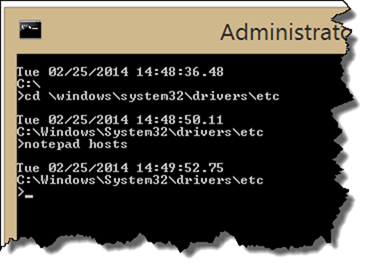
Open a Command Prompt window as an Administrator. Type cd windowssystem32driversetc and press <enter>.
Next, open the hosts file in notepad. Type notepad hosts and then press <enter>.
Step #12: Using notepad, add an entry for the domain name
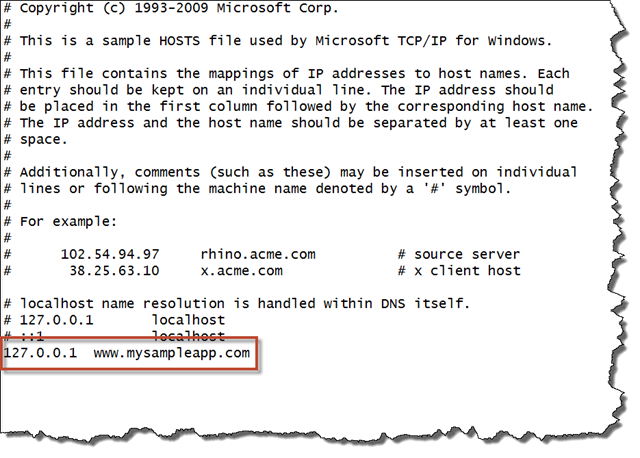
Notepad.exe should now be open and it should look similar to the file below. Go to a blank line. Type 127.0.0.1 www.mysampleapp.com and save the file. You can now exit notepad.
Step #13: Verify hosts file changes for www.mysampleapp.com
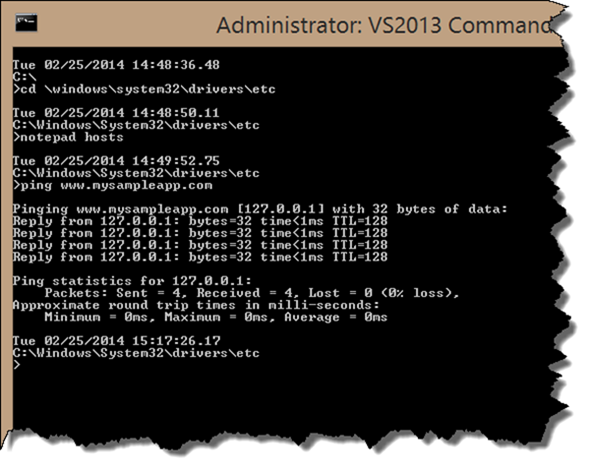
You can verify that your changes to the hosts file worked by doing a ping test. Type ping www.mysampleapp.com and press
You should see ping output that looks similar to the screenshot below.
Step #14: Re-open Visual Studio as an Administrator
By default, an ASP.NET MVC project in Visual Studio opens for debugging purposes in IIS Express. Out of the box, IIS Express does not support custom domain names and, because of this, I decided to run/debug this sample using the full version of IIS. In order to configure the settings for this, Visual Studio needs to be run as an Administrator so that it can administer IIS’s settings.
Save any changes to the solution in Visual Studio. Close Visual Studio. Re-run Visual Studio as an Administrator.
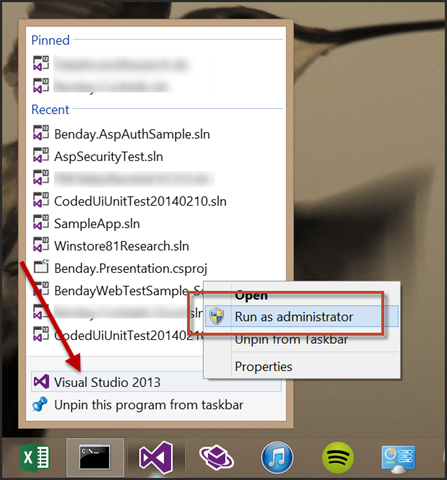
Here are the steps if your Visual Studio app icon is pinned to the task bar. Right-click the Visual Studio 2013 icon. When the menu comes up, right click the small Visual Studio 2013 icon and choose Run as administrator from the context menu.
When Visual Studio 2013 is open, re-open the solution (*.sln).
Step #15: Change the settings for the ASP.NET MVC project
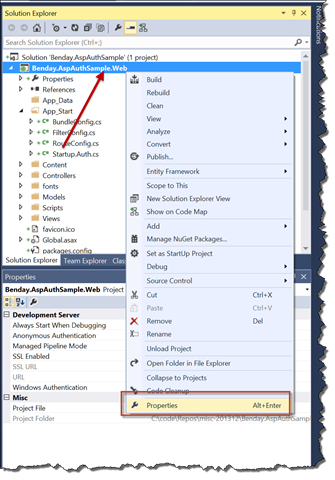
In Solution Explorer, right-click the ASP.NET project and choose Properties from the context menu.
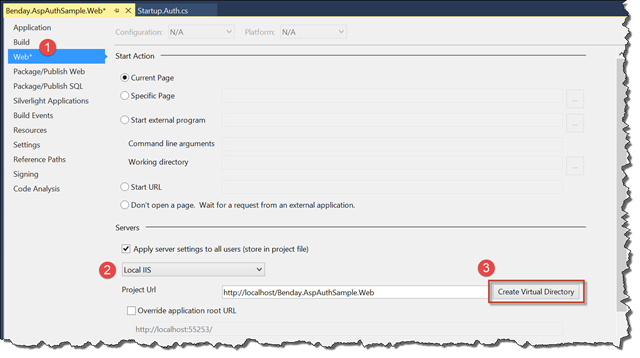
From the left column, choose Web. Under the Servers section, change the drop down list to say Local IIS. Click the Create Virtual Directory button to finish configuring IIS. If prompted
The IIS site has now been created.
Click the Save button in Visual Studio to save the changes to the project file. You’re going to be prompted to modify your database connection strings. Click Yes.
Step #15: Verify your database connection settings in Web.config
Chances are high that your database connection string is now wrong. Open the Web.config file for the ASP.NET project. Locate the connection string for DefaultConnection. Verify that this database connection string points to a valid database.
Step #16: Run the app
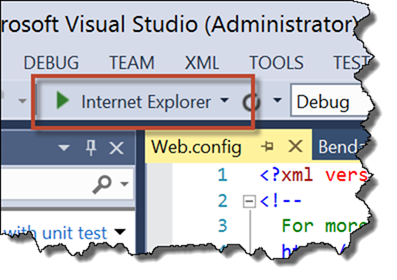
Start debugging the app using Visual Studio.
When the browser comes up, change the URL field to be the same URL but with www.mysampleapp.com instead of localhost.
In the upper-right corner of the window, there’s a link that says Log in. Click the Log in link.
Step #17: Log into the app
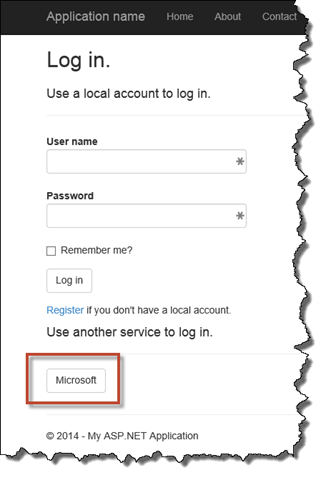
You should now be on the login page. There should be a section of the page that says Use another service to log in and there should be a button that says Microsoft. Click the Microsoft button.
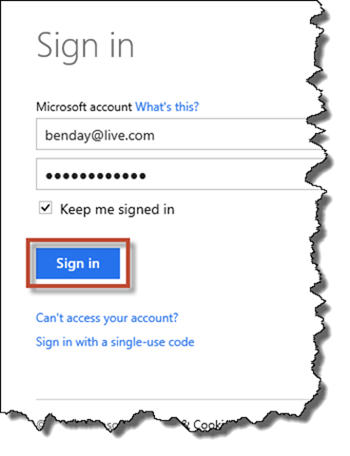
You should now see the Microsoft account login screen. Enter your username and password and click Sign in.
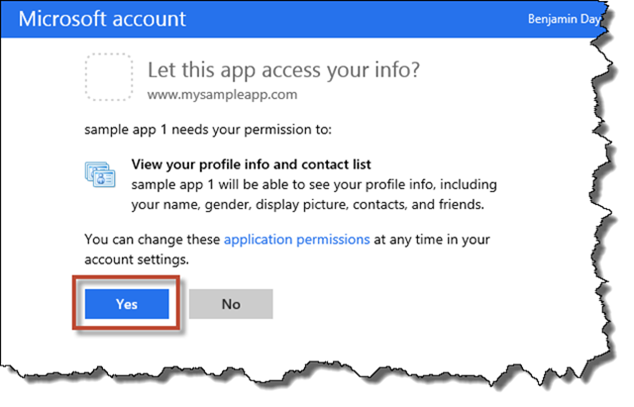
You should now see a screen that is asking Let this app access your info. Click the Yes button.
Step #18: Enjoy
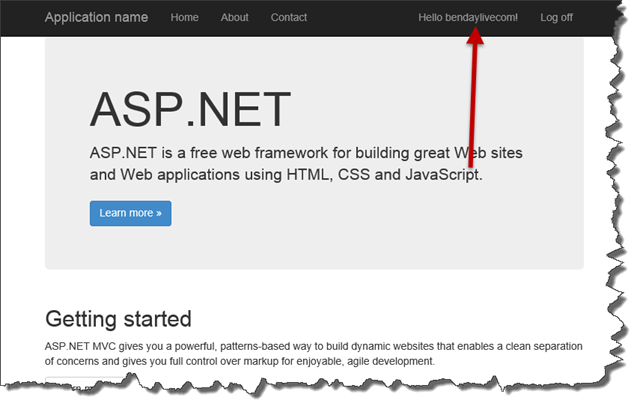
You should now be finished logging in and you should see your user account info in the menu bar. You’re done!
I hope this helped!
-Ben


