NuGet is for package management is great. Refer to some package from your Visual Studio projects and you can easily include those binaries in your project. And if you're got some library that you want to share with the world, you can publish a NuGet package and everyone can use your stuff.
But what if want to do that without having to publish your stuff to the world? Put another way, you've got common code or common libraries that you want to use internally in your organization but you don't want to share that code out to the world. How do you handle that internal, private NuGet use case?
A Private NuGet Server in Team Foundation Server 2017
With TFS2017, you can install an extension that allows your TFS machine to host private NuGet packages. It's about 10 clicks to get that installed and then you can start publishing and hosting NuGet packages that you can use internal to your company. This is super helpful for handling all that common code that your solutions probably use. Right now, you probably refer to those binaries by adding them into a "lib" or "binaries" or "dependencies" folder in version control. If you're using Team Foundation Version Control (TFVC), this isn't the end of the world -- it's nice to try to keep your binary dependencies out of source control but it's not mandatory. If you're using Git, keeping your binary dependencies out of your repo is highly important so that you don't have a wildly overgrown gigantic Git repo.
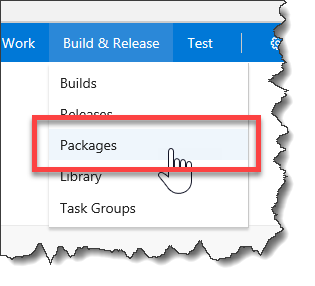
You can tell if you have this extension installed by going to the web interface for your TFS Team Project and checking the Build & Release menu. When you open the drop down list for Build & Release, if you see Packages, then you've got the Package Management server extension installed.
Install Package Management
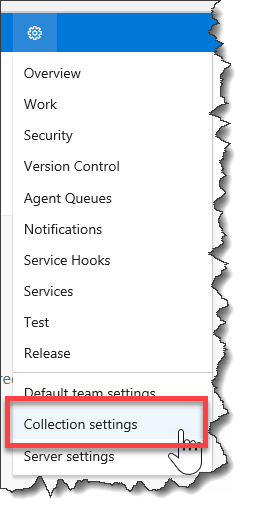
If that Packages option is missing, you can install the extension from Collection Settings. Click the gear icon and choose Collection settings.
Click on the Extensions tab. From the Extensions tab, click Browse Marketplace.
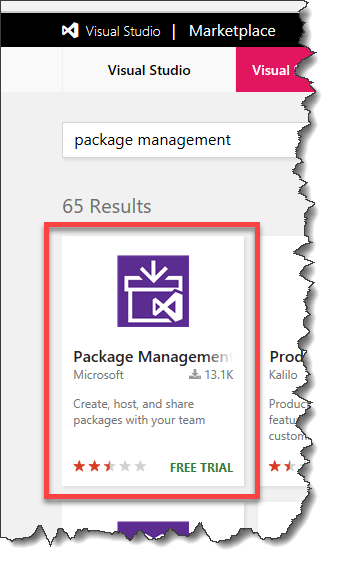
Search for "package management" and then click on the Package Management icon in the search result.
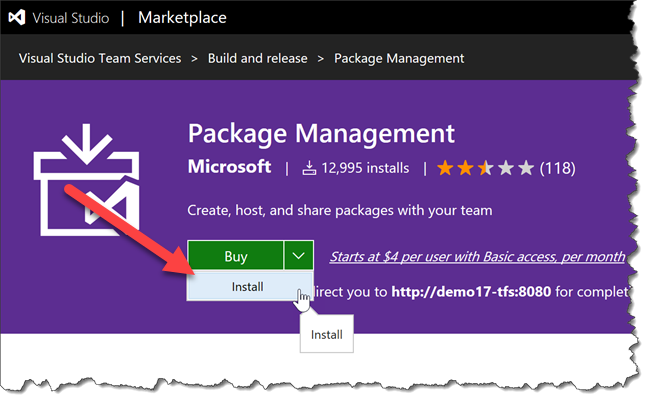
From the Package Management details page, pull the drop down on the Buy button to reveal the Install option. Click on the Install option to begin the installation process.
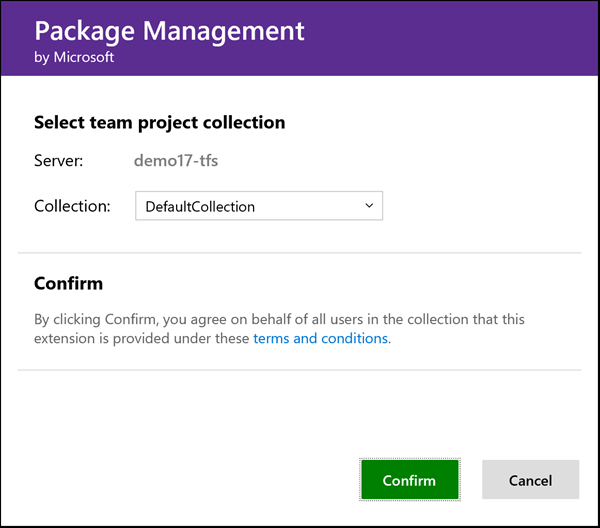
Choose the TFS Team Project Collection that you want to install this extension for and click Confirm.
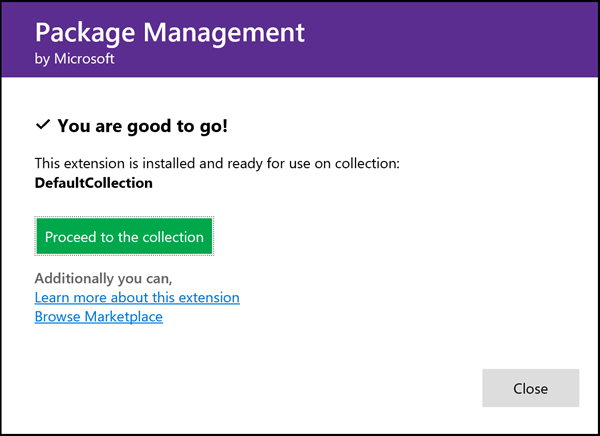
After a few seconds, you should get a dialog that says that it's been installed. Click the Proceed to the collection button.
Create Your NuGet Package Feed
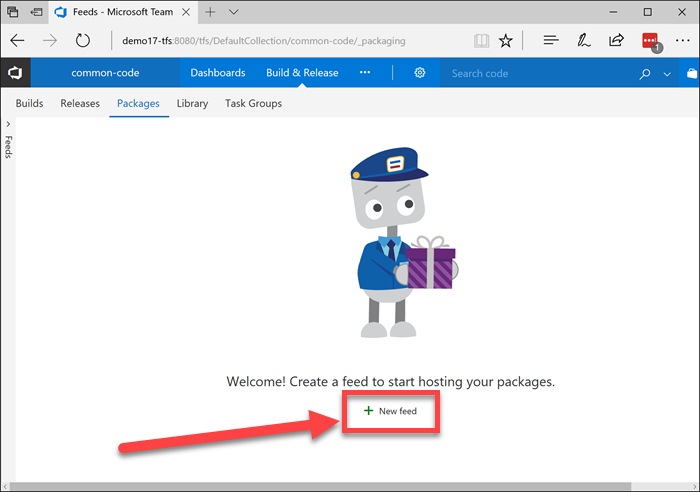
In the web interface, navigate to your Team Project and then click the Packages tab. In my case, my Team Project is called "common-code". You should see a screen that looks like the one below. To create your first NuGet package feed, click on the New feed button.
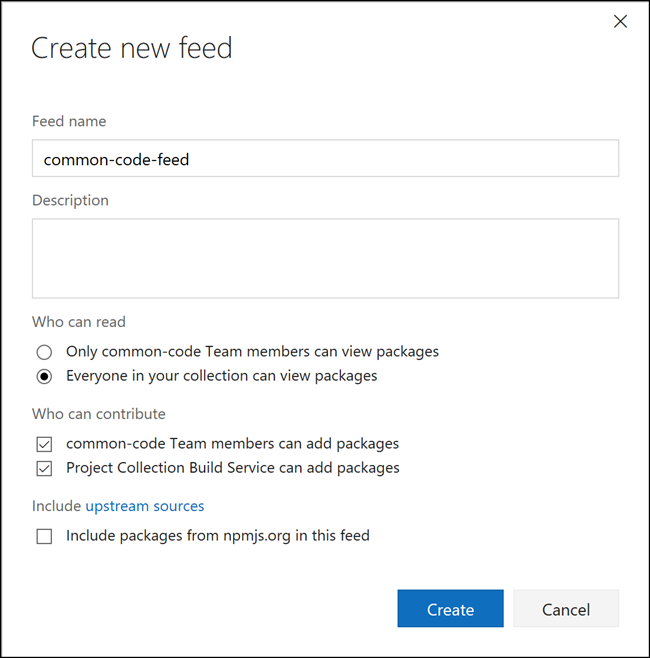
You should now see a Create new feed dialog. Give your feed a name (example, common-code-feed). To keep permissions management simple, we're going to set some pretty relaxed permissions for this feed. Under Who can read, choose Everyone in your collection can view packages. Under Who can contribute, check Team members can add packages and Project Collection Build Service can add packages.
When you've finished setting the options, click the Create button.
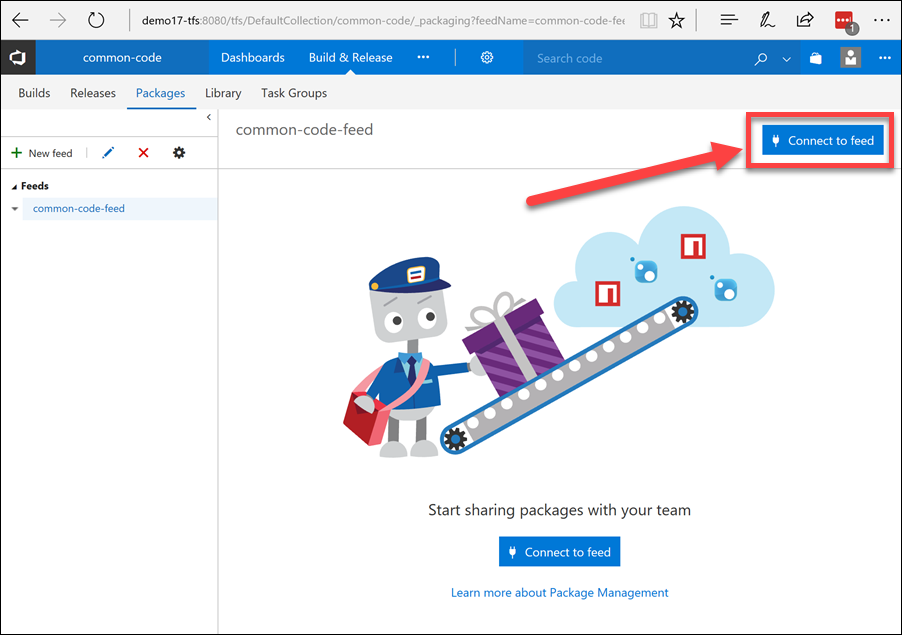
You should now see your new NuGet feed. This feed has a URL for it and you'll need to make a note of this for use in a later step. Click the Connect to feed button to bring up the feed details.
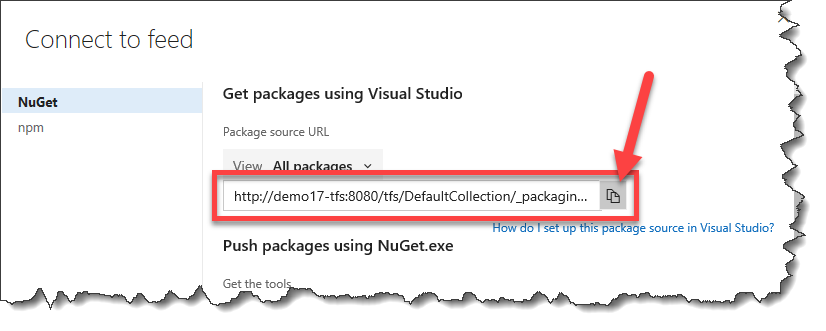
You should now see the Connect to feed dialog. On the NuGet tab, you should see the Package source URL. Copy this value to the clipboard or make a note of it somehow. HINT: YOU'RE GOING TO NEED THIS VALUE IN A FEW MINUTES!!!
Close the Connect to feed dialog.
Publish a NuGet Package from your TFS Build
Ok. So you have your NuGet feed set up in TFS. But it's empty. So how do you actually add stuff to it? Well, the most reliable way to do it (and the most DevOps-centric way to do it) is to publish NuGet packages directly from an automated build.
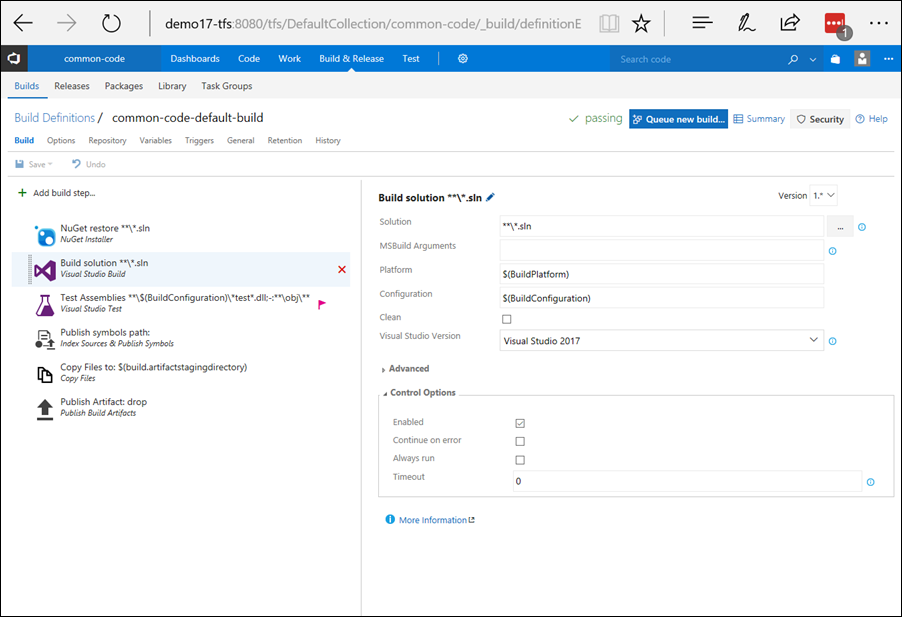
For this walkthrough guide, I'm assuming that you know how to add code to version control and know how to create an automated build definition in TFS. My code sample is a simple class library and I've created a simple build definition in TFS2017 called common-code-default-build.
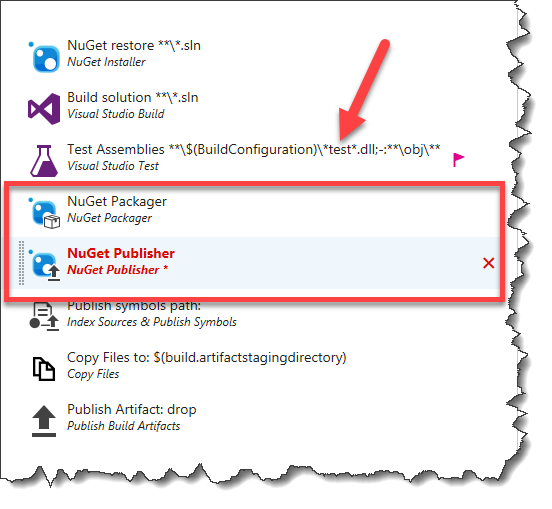
You're going to add two build steps to your build definition: 1) NuGet Packager and 2) NuGet Publisher. The Packager step creates the nupkg file that contains the info about your package. The Publisher step pushes the nupkg to the package feed.
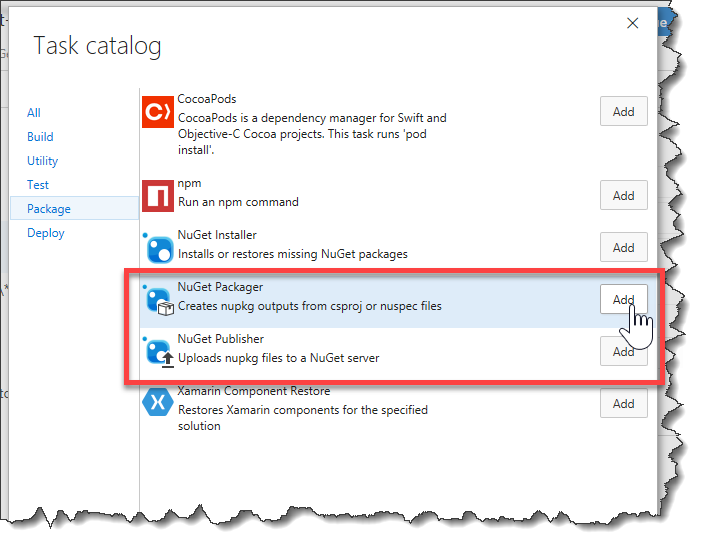
On your build definition editor, click the Add build step... button. This will bring up the Task catalog dialog. On the dialog, click the Package tab.
Find NuGet Packager and click the Add button. Find the NuGet Publisher and click the Add button. Close the task catalog dialog.
You should now see the list of build steps and the NuGet steps that you just added should be at the bottom. Drag the steps so that they're after the Test Assemblies step.
Configure the NuGet Packager Step
Now that you have the steps added and put in the correct order in the build, let's configure the steps to actually do something.
Click on the NuGet Packager step to bring up the details.
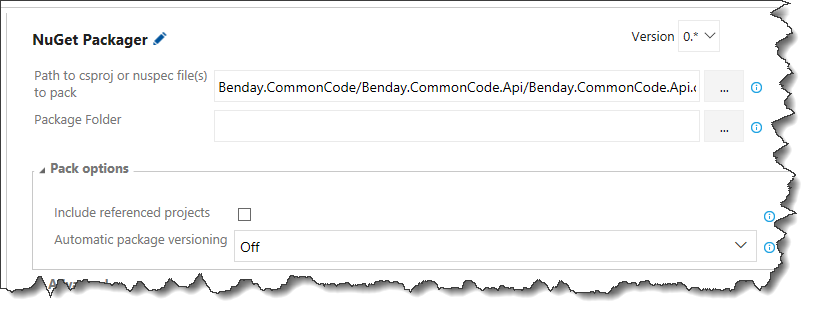
Next to the Path to csproj or nuspec file(s) value, click the ellipsis button.
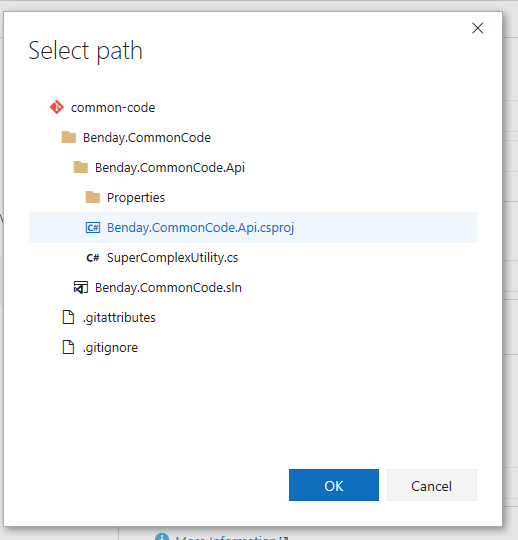
Use the Select path dialog to navigate to the folder that contains the csproj file for the project you want to publish, choose the csproj file, then click the OK button.
Your NuGet Packager step should now look something like the following image.
Configure the NuGet Publisher Step
Next, click on the NuGet Publisher step.
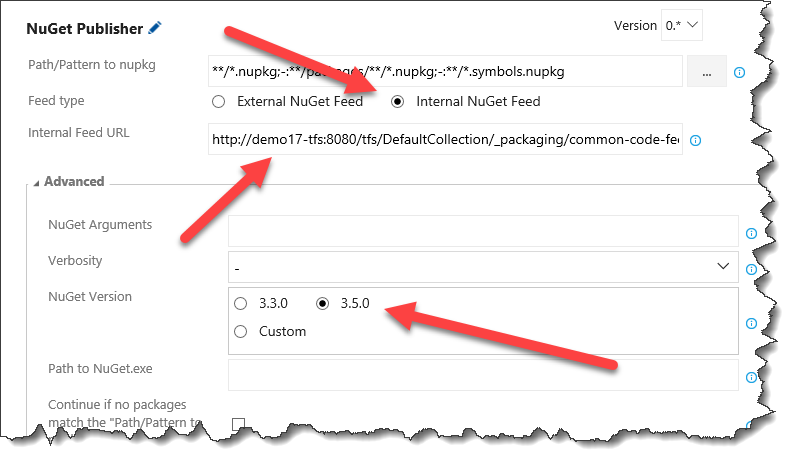
Under Feed type, select Internal NuGet Feed.
Remember that value that I said to make a note of and/or copy to your clipboard? Well, you need it now. Set the Internal Feed URL to the value for the NuGet package feed that you created a few minutes ago.
Expand the Advanced section of the editor and set NuGet Version to 3.5.0.
Save the build definition. You're ready to go.
Run the Build Definition & Verify the NuGet Package Got Published
Ok. You've configured the steps and saved your build. Click the Queue new build... button to run your build.
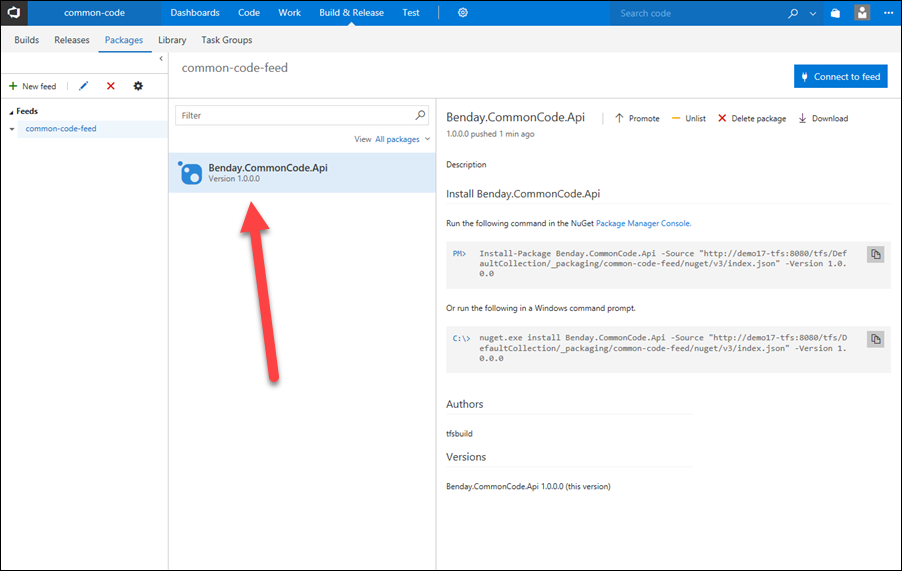
Assuming that the build completed successfully, your new NuGet feed should have something in it. Navigate to the Packages tab and in the left panel, click on the NuGet feed that you created. It should look something like the image below and you should see your new NuGet package.
That's it. You're done. You've successfully created a NuGet package and published that package to your new internal NuGet server in Team Foundation Server.
In my next post, I'll show you how to use this NuGet package from Visual Studio & TFS Builds.
Enjoy.
-Ben
-- Looking for help getting going with TFS and NuGet? Need to optimize and organize your automated builds? Want to get good at DevOps? We can help. Drop us a line at info@benday.com.

