Ok. So you’re doing Scrum and you’re using Team Foundation Server 2012 (TFS2012) or Team Foundation Server 2013 (TFS2013) to plan and manage your work. If you’re like a lot of companies, you’ve got more than one Scrum Team working on different features. Team Foundation Server does a good job of managing multiple teams inside of a single TFS Team Project and the Agile/Scrum planning tools work great. But there’s a catch. Those planning tools assume that each team has it’s own Product Backlog.
What do you do if you have a handful of teams in TFS that are working off a shared Product Backlog? For the purposes of Sprint Planning, the teams talk to the Product Owner and work (the Product Backlog Items or PBIs) from the shared Product Backlog gets “farmed out” to the individual teams. Once the PBIs have been “farmed out” they then show up in the Product Backlog for that team and then the team plans out its work in TFS. Basically, the PBI work items get moved from the global shared Product Backlog into the team’s Product Backlog and then they get planned.
That makes sense, right? Unfortunately, this isn’t a workflow that is supported out-of-the-box in TFS.
The Problem
How do you take PBIs from a shared Product Backlog and hand it off to a Team using TFS?
(Disclaimer: I’m being very careful to not say “assigned to the team”. I’m assuming that you’re still having nice, healthy discussions about Sprint Goals between the Teams and the Product Owner. This post is more about the mechanics of doing this with TFS rather than the philosophy of doing multi-team Scrum.)
The Short Description of the Fix
When you have multiple teams in TFS, TFS creates separate Areas (System.AreaPath) for each Team. You need to create a Work Item Query (WIQ) to view the PBIs that have not been assigned to a Team and then change the Area for the PBIs in order to assign them to a Team.
The Longer Description of the Fix
Step 1: Open TFS Web Access
First off, you’re going to do all of this in a browser through Team Foundation Server Web Access. If you’re using an on-premise version of TFS, the address is http://servername:8080/tfs/web. If you’re using Team Foundation Service (the Azure-based version of TFS), it’ll be http://account-name.visualstudio.com.
When the Web Access site comes up, you’ll choose your Team Project either by clicking in the recent projects list or by clicking the Browse all… button and following the dialogs.
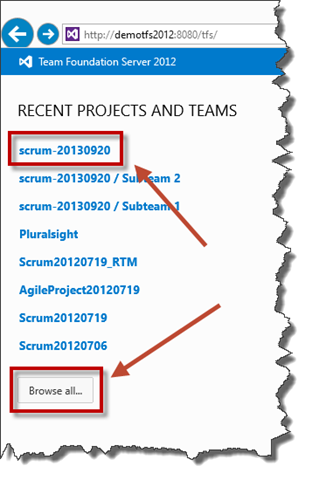
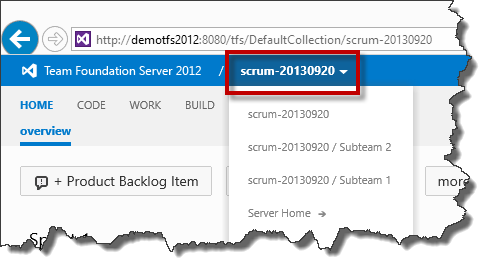
When you get to the main page for your project, the top bar in the window should show the name of the Team Project and not the Team Project name followed by a sub-team name. For example, in the screenshot below, the selected project is “scrum-20130920” and not “scrum-20130920 / Subteam 1” or “scrum-20130920 / Subteam 2”. If you’ve got the wrong value selected, click the Team Project name and choose the correct value from the list.
Step 2: Clone the Backlog Query
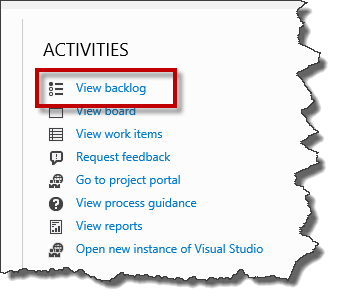
Next, navigate to the Product Backlog board by clicking the View backlog link as shown below.
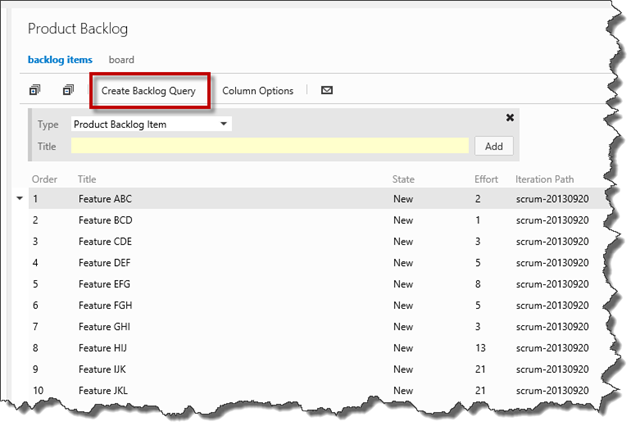
You should now see the Product Backlog and all the Product Backlog Items (PBIs) that are for the Team Project (see screenshot below). Remember, our goal is to take some of these PBIs and hand them off to the individual Scrum Teams (sub-teams) for further planning and execution.
What we need is a Work Item Query (WIQ) that we can modify to show just the PBIs that haven’t been assigned to a Team. To start this process, click the Create Backlog Query button. This will create a clone of the query that drives the Product Backlog board and does not modify the query for the board in any way.
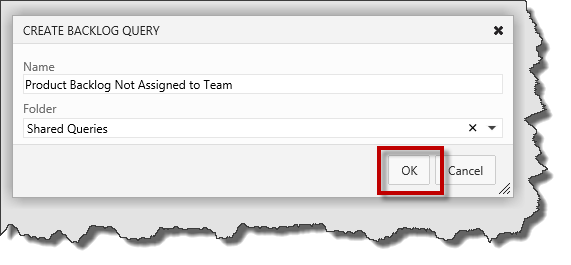
When you click the Create Backlog Query button you’ll get a dialog prompting you to save this new WIQ. Set the Name field to Product Backlog Not Assigned to Team, set the Folder to Shared Queries, and click the OK button as shown below.
Step 3: Modify the Query
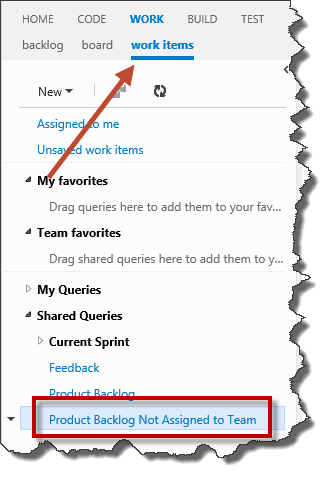
The new query has been created. To view it, click the Work Items link in the menu as shown below and then expand the Shared Queries folder. The new query should be visible in the Shared Queries folder. Click on the Product Backlog Not Assigned to Team query.
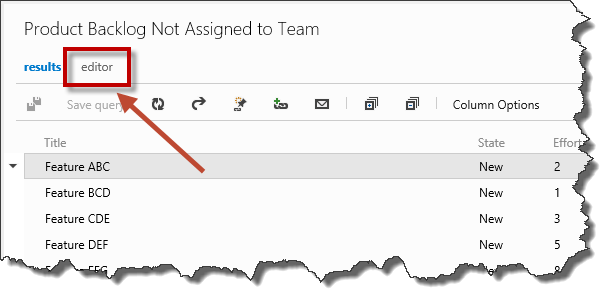
In the right-side panel, you’ll see the results of the query and the list of PBIs should be the same as what you saw on the Product Backlog editor screen. We need to modify this query to hide the PBIs that we’ve already farmed out to the other teams. Click the editor link to start modifying the query.
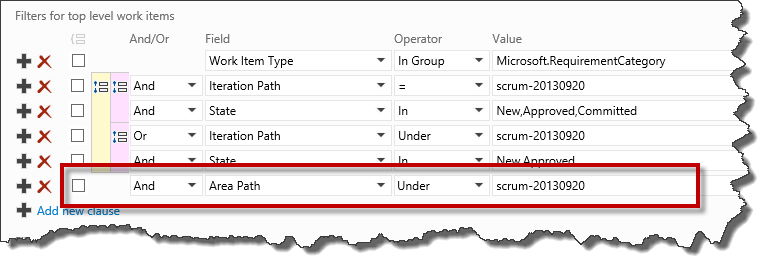
After you click the editor link, you’ll see the details on the query. The item you’ll need to modify is the Area Path criteria. It probably says something like “Area Path Under project-name” or “Area Path Under @Project”.
Modify the criteria to return only the items at the root level of the backlog. Change the Operator field to = (equals) and verify that the Value field is the name of the Team Project without any trailing team name as shown below.
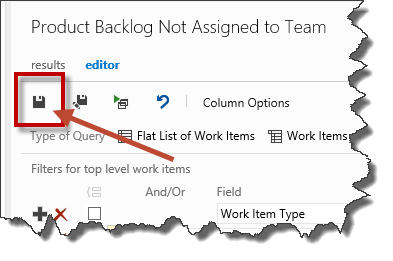
Click the Save button as shown below to save your change to the query.
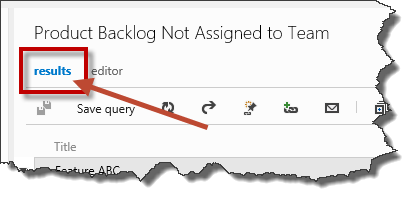
Click on the results link to display the results of the query.
Step 4: Use the Bulk Editor to Hand Off Work to the Team(s)
At this point, you’ve got the Work Item Query set up to begin managing the list of unassigned PBIs in the global, top-level Product Backlog. The last step is to use this new work item query and the bulk editing features of TFS Web Access to hand off work to the teams.
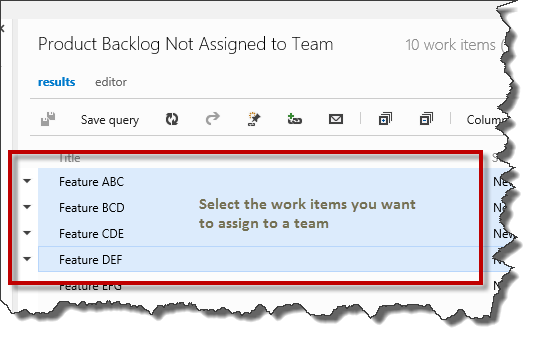
In the results window, select the work items that you want to hand off to a team.
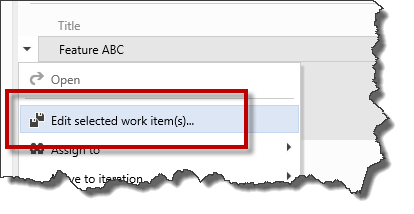
Now that you’ve selected the work items, right-click the work items and choose Edit selected work item(s)… from the menu.
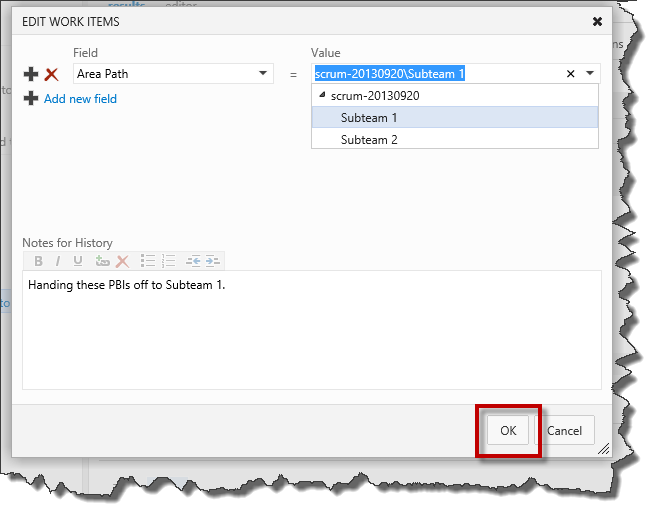
You should now see a dialog with the title of Edit Work Items. This is the work item bulk editor and it allows you to modify values on multiple work items simultaneously. Set the Field value to Area Path. Set the Value field to be the name of the team you want to assign the PBIs to. Optionally, set the Notes for History field to be Handing these PBIs off to Subteam 1. When you’ve finished setting the values on this dialog, click the OK button.
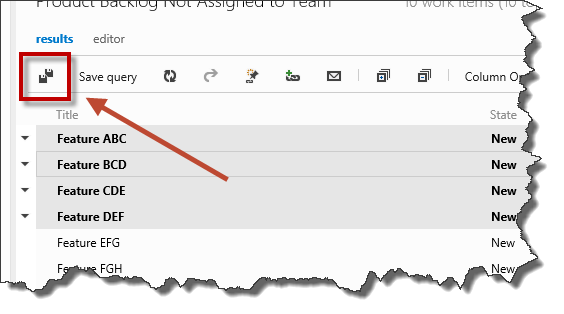
Save the modifications to the selected work items by clicking the Save results button as shown below.
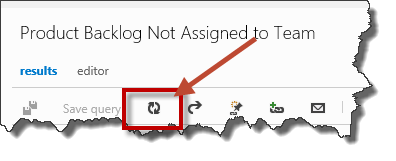
Click the Refresh button and the selected PBIs should disappear from the results window.
Step 5: Verify That the PBIs Have Appeared in the Team’s Backlog
The work items have been handed off to the team. At this point, the PBIs should appear in the team’s backlog.
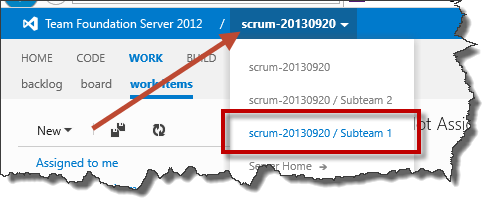
To view the backlog for the team, you’ll need to change the context for the page. From the top menu, click on the team project name and choose the team from the list. In the screenshot below, we’re changing the context from “scrum-20130920” to “scrum-20130920 / Subteam 1”.
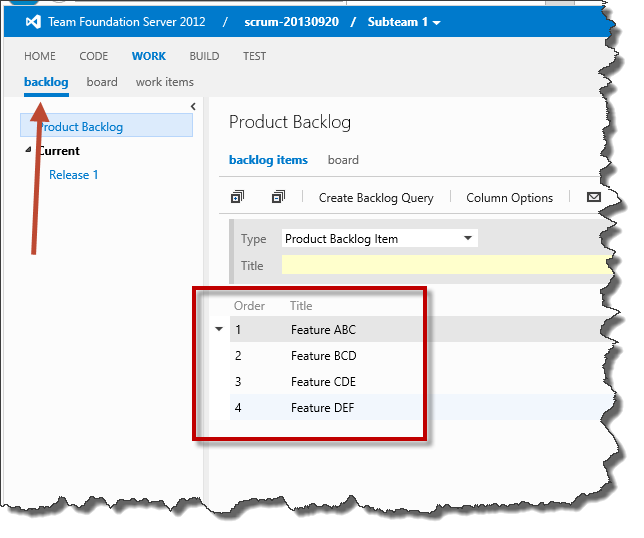
Click on the backlog link to bring up the Product Backlog editor. You should now see the PBIs that you assigned to this team in the grid.
Now that these PBIs have been handed off to the team, the team can continue their Sprint Planning work as they usually would.
I hope this helps.
-Ben
-- Looking for help doing Scrum with Team Foundation Server 2012 or Team Foundation Server 2013? Wondering if your team(s) could use a Scrum “tune-up”? We can help. Drop us a line at info@benday.com.
