If you're using Team Foundation Server's Test Hub for your QA testing effort, you've probably seen this annoyance. All of your test cases say "Windows 8" in the Configuration column. Windows 8?!? What is this? 2014?! You'll hit your next level of frustration about 20 seconds later when you find out that there's no way to change this.
[caption id="attachment_8951" align="alignnone" width="639"]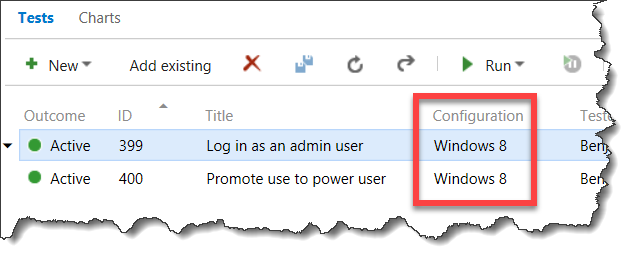 TFS Test Case Configuration says 'Windows 8'[/caption]
This is one of the things you can't change in the web interface. You're going to have to open up Microsoft Test Manager (MTM) for this one.
Step 1: Open the Test Plan with Microsoft Test Manager
In the left pane of the Test Hub, click the 'Open test plan using Microsoft Test Manager' button.
[caption id="attachment_8952" align="alignnone" width="495"]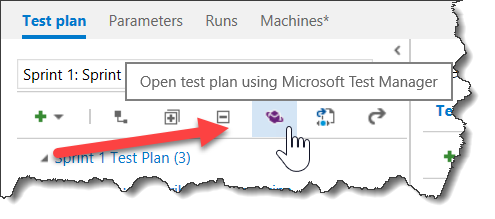 Click the 'Open test plan using Microsoft Test Manager' button[/caption]
This will bring up Microsoft Test Manager and you should see a screen that looks like this.
[caption id="attachment_8961" align="alignnone" width="1024"]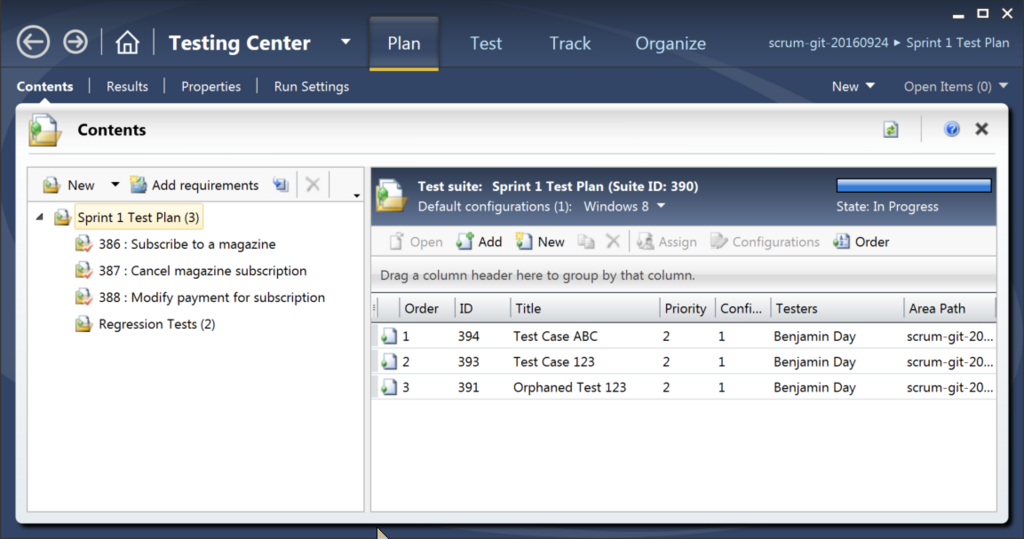 Your Test Plan in Microsoft Test Manager (MTM)[/caption]
Step 2: Edit Run Settings & Configurations
The configurations editor is a little buried. First, click on the Run Settings tab. Next, under Configurations, open the In this plan drop down menu. You should now see a dialog that says Default configurations for new test cases. Click the Manage link on this dialog.
[caption id="attachment_8971" align="alignnone" width="926"]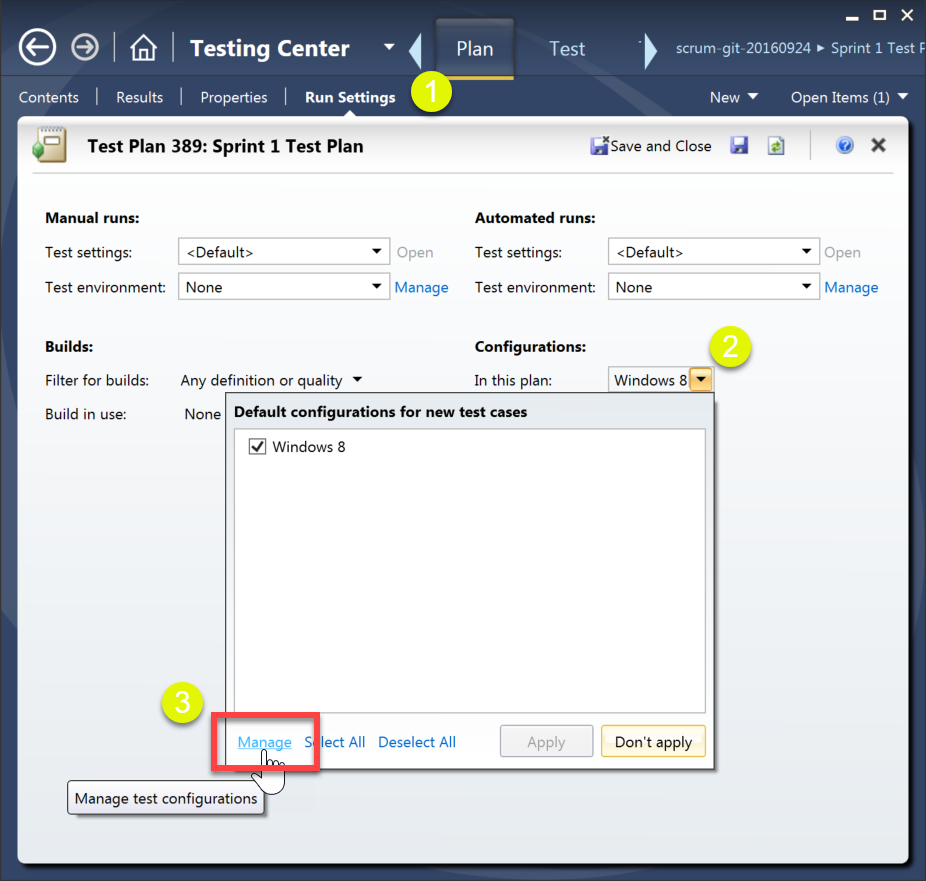 Go to Run Settings, open Configurations, and click Manage[/caption]
Step 3: Test Configuration Editor
Ok. So you've got some options on this step. If you're not all that picky and just want the "Windows 8" word to go away, you're almost done. If you're a little more obsessive, you've got some more steps after this one.
This screen is where your problem lives. By default, you've got one Test Configuration and it's for Windows 8. A Test Configuration describes the attributes of the system that you're running your tests on or against. If you're in to extreme traceability, you're in luck and you can describe your test targets in extreme details. If you're not in to that, you can just create simple and mostly empty Test Configurations that just have names on them.
To change the name, select the Windows 8 test configuration and click the Open button.
[caption id="attachment_8981" align="alignnone" width="497"]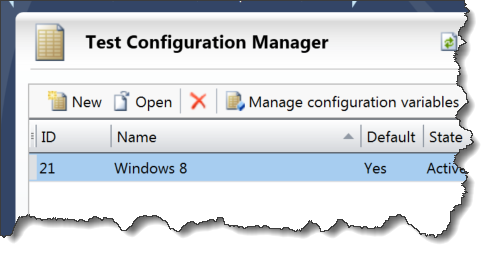 This is the source of the problem[/caption]
Step 4: Change the name of the Test Configuration
You should now see an editable version of your Test Configuration. Change the name of the Test Configuration and click Save & Close. If you're not too picky about the details, you're done and you can skip to the end. But you may have noticed that there are these Configuration Variables attached to the Test Configuration and the Operating System value still says 'Windows 8'. Yah. Annoying, huh? Kinda nags at you, right? It's the QA testing equivalent of an itchy, wool sweater -- you just can't quite get comfortable.
[caption id="attachment_8991" align="alignnone" width="612"]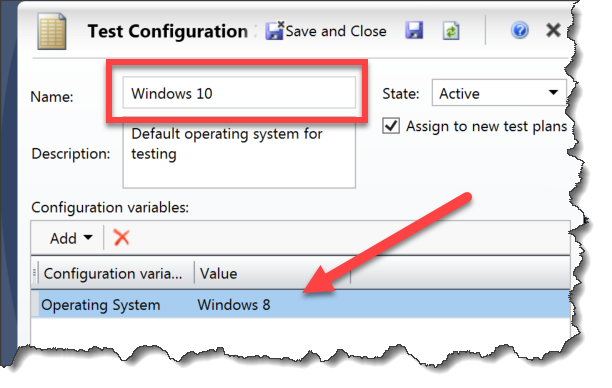 Change the name of the Test Configuration from Windows 8[/caption]
Step 5: Fix the Operating System Configuration Value
Back on the Test Configuration Manager screen, click the Manage configuration variables button.
[caption id="attachment_9001" align="alignnone" width="527"]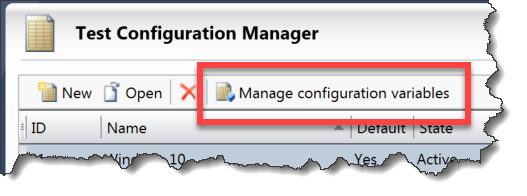 Click the Manage configuration variables button[/caption]
Step 6: Manage Configuration Variables
You should now see the Manage Configuration Variables screen. In the left panel, click on the Operating System line. You should now see the list of allowed values in the right panel. In the right panel, add the operating system values that you want (for example, Windows 10 and Windows Server 2016) and then click the Save configuration variables button.
[caption id="attachment_9011" align="alignnone" width="657"]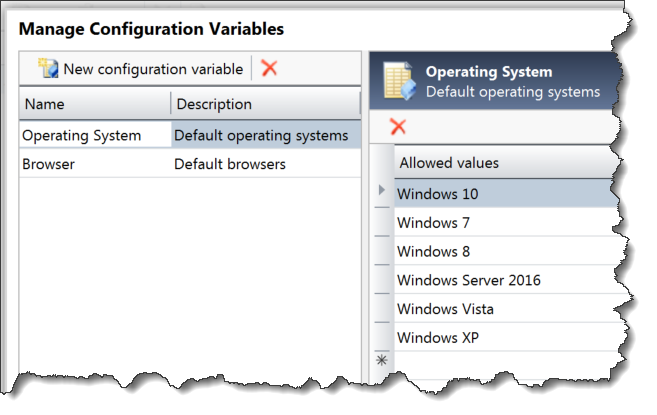 Click on the Operating System item then add more values[/caption]
Step 7: Edit the Test Configuration to use the new Operating System values
You should now be back on the Test Configuration Manager screen and you should see your Windows 10 Test Configuration. Select that Test Configuration and click the Open button.
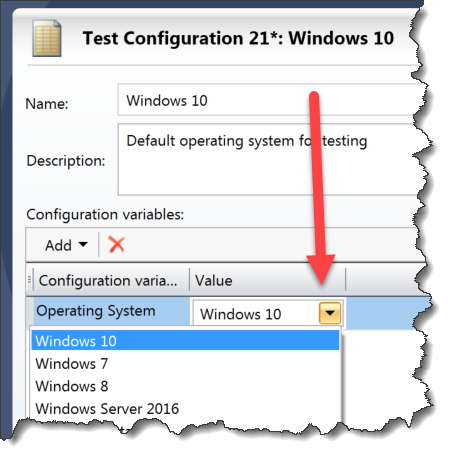
Open the drop down list for Operating System. You should now see the new Operating System variable values that you just added. Choose Windows 10 from the drop down list**.** Click the Save and close button.
Step 8: Close Microsoft Test Manager (MTM) and reload the TFS Test Hub
Ok. You're pretty much done in MTM. Close MTM and go back to the TFS Test Hub in your browser. Reload the Test Hub page.
All your test cases should now say Windows 10. Problem solved.
[caption id="attachment_9031" align="alignnone" width="659"]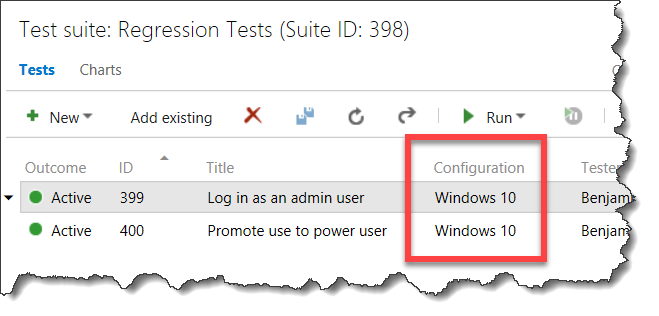 TFS Test Hub Test Cases now say Windows 10[/caption]
I hope this helped.
-Ben
-- Want some help getting your QA testing effort into TFS? Need some training to get going with Scrum & Agile Testing? We can help. Drop us a line at info@benday.com.

