Back in September, I wrote a blog post talking about what you need in Azure DevOps to streamline Scrum Product Backlog refinement. The gist of that article is that the default states in Azure DevOps for the Product Backlog Item and User Story work items aren't enough. If you want to get good at Scrum backlog refinement and you want to be able to keep track of your Product Backlog, you'll want to add two states to your requirement work item type (User Story or Product Backlog Item): "Needs Refinement" and "Ready for Sprint".
When I wrote that original article, I didn't give a lot of info on how to actual make those changes. In this article, I'm going to show you how to do it. The steps depend on what kind of Team Project Collection you're working with.
Option 1: Azure DevOps Services & Inherited Process Model Team Project Collections
If you're using Azure DevOps Services (aka. the cloud version of Azure DevOps), you'll use this approach. If you're using Azure DevOps Server (aka. the on-premise version of Azure DevOps) and you're using a fairly new Team Project Collection, this might be what you'll use.
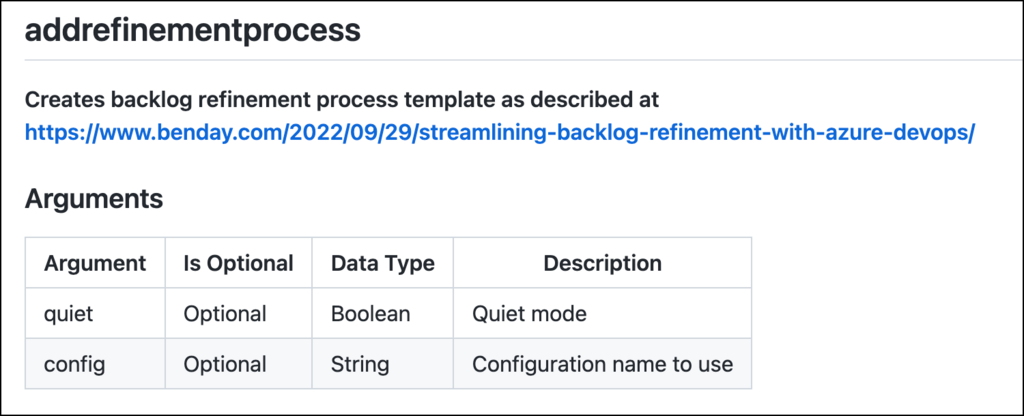
My azdoutil tool has a command in it called addrefinementprocess. When you run azdoutil addrefinementprocess, it'll create a new inherited process in Azure DevOps called "Scrum with Backlog Refinement". That new process will inherit from the default Scrum process and it will have a customized version of the Product Backlog Item work item type. The PBI work item type will have those two additional states: Needs Refinement and Ready for Sprint.
The documentation for azdoutil addrefinementprocess
To install and run azdoutil you'll need to install .NET Core 7 and then run dotnet tool install azdoutil -g from the command line to install the util. Once azdoutil is installed, you'll need to run azdoutil addconfig to connect to your Azure DevOps instance.
Running the add refinement process command is simple. Just go to the command line and run azdoutil addrefinementprocess and it will create the new process.
Once the command runs, you can go to the Organization Settings page of Azure DevOps and go to the Process section. Here's the URL: https://dev.azure.com//_settings/process
The Scrum with Backlog Refinement process
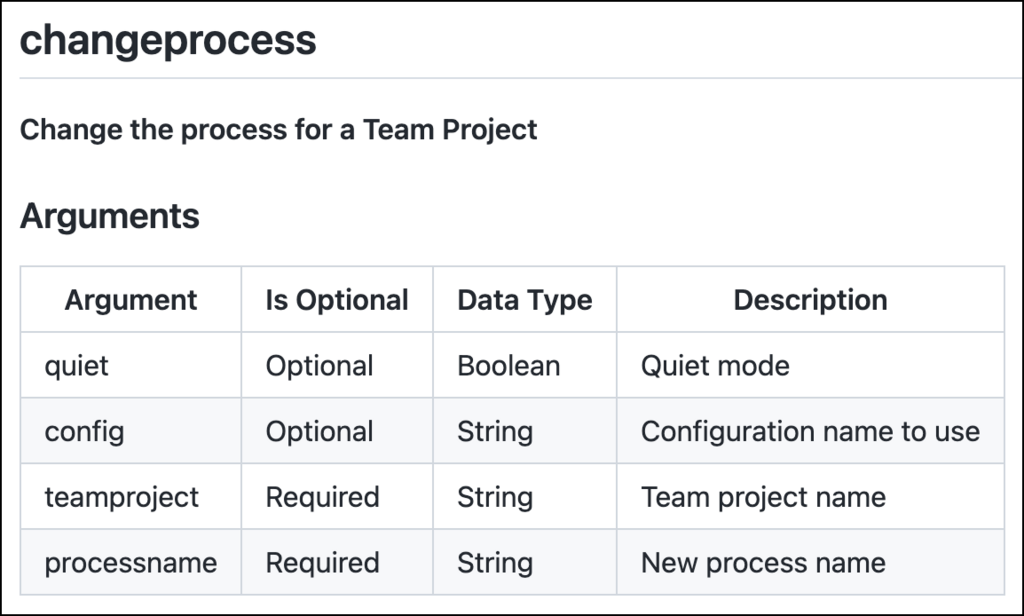
To start using this new process, you'll need to change the process for your Team Project. You can do that either from the Process editor in Azure DevOps or you can run azdoutil changeprocess.
The documentation for the azdoutil changeprocess command
The syntax you'll use will be something like
azdoutil changeprocess /teamproject:MyTeamProject /processname:"Scrum with Backlog Refinement"
Option 2: XML-based Team Project Collections
If you've got an XML-based Team Project Collection (TPC) or your account in Azure DevOps uses the XML-based format, I've written the script so that it should be relatively easy to apply these changes. That script is in the zip file and it's named import-pbi.ps1. The import-pbi.ps1 script will help you to apply the backlog refinement state customizations.
You'll need to run the script once per Team Project that you want to customize.
WARNING: If you've already made customizations to your Product Backlog Item work item type in Azure DevOps, ** DON'T RUN THIS SCRIPT **!!!! This script will wipe out the customizations that you have.
The script attempts to protect you from catastrophic failure by creating a backlog of your Product Backlog Item work item type definition (WITD) before this script uploads the PBI customizations.
That said...please be careful. Ok? Working with XML-based Team Project Collections is much less forgiving than the modern, Inherited TPC model.
You'll need to make some edits to the import-pbi.ps1 script.
Step 0:
You'll need to run this on a Windows machine that has Visual Studio or the Team Explorer tools installed. That's how you'll get the witadmin.exe utility from Microsoft.
Step 1:
Download the script files to your machine. Extract the zip. Open import-pbi.ps1 in a text editor such as Visual Studio Code.
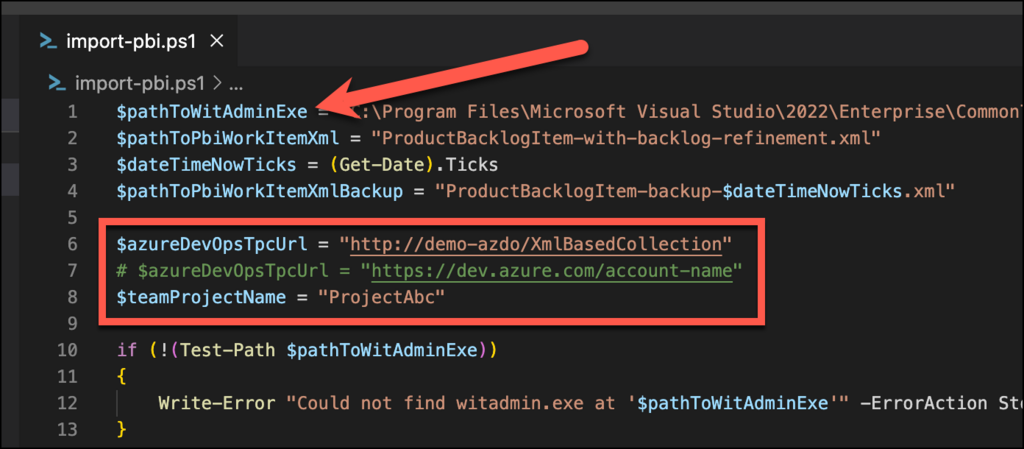
You should now see the import-pbi.ps1 script and it should look similar to the image below.
The import-pbi.ps1 script with the variables to edit & verify
Step 2:
Verify that the path to witadmin.exe in $pathToWitAdminExe is correct.
Step 3:
Set the URL to your Team Project Collection or Azure DevOps Services account into the $azureDevOpsTpcUrl variable.
Step 4:
Set the name of the Team Project that you want to apply these changes to into the $teamProjectName variable.
Step 5:
Run import-pbi.ps1
Step 6:
Enjoy.
Summary
If you want a better, easier way to manage your Scrum Product Backlog and your backlog refinement process in Azure DevOps, adding a couple of state values to your PBI work item type can help a lot.
Once you have the "Needs Refinement" and "Ready for Sprint", you'll have a much better idea about how you're doing as a team at tending your Product Backlog.
Remember: for best results, try to keep 2 to 4 Sprints worth of Ready product backlog items in your backlog!
I hope this helps.
-Ben
-- Looking for help with your Scrum Product Backlog in Azure DevOps? Need some help automating your way to done and delivery with Azure DevOps Pipelines? Thinking about training your team on Scrum and/or Azure DevOps? We can help. Drop us a line at info@benday.com.


