I've been neck deep in Azure App Authentication (aka. Easy Auth) lately trying to get it to work with ASP.NET Core applications. I wrote a bunch of labs/walk-throughs last week to demonstrate how to make it work. Here are the posts in the Azure Easy Auth series: Lab 1, Lab 2, Lab 3, Lab 4, Lab 5.
My real motivation was that I wanted to write *this* blog post (aka. the one that you're reading right now). The problem was that there was so much content to cover that it was going to be either a book-length blog post or a set of blog posts.
Azure Web Apps are awesome. So much good stuff packed into such a small package. One of my favorite features is the ability to set up authentication providers for your apps without having to modify your application code. Want to let users log into your app using their Azure Active Directory (AAD) account, Microsoft Account (MSA), Google account, Twitter account, or Facebook account? You can do that with in a matter of minutes by setting some values in the Azure Portal for your app service.
This security stuff and the services that make it work are commonly referred to as "Easy Auth".
Easy Auth can turn into Not-So-Easy-Auth once you want to do some stuff that gets a little complicated. Basically, if your app authenticates using just one authentication provider and only allows authenticated users, your life is easy. When you want to allow multiple authentication providers, have a mixture of public and private pages in the application, and have a local development mode authentication that you can use in Visual Studio, then things get a lot harder.
If you live in the more complex zone, then the sample code for this blog post should help you out.
Azure App Authentication Beyond the Basics
Let's say that you've set up multiple authentication providers for your Azure Web App. In the following image, I've configured Azure Active Directory (AAD) and Microsoft Accounts (MSAs).
[caption id="attachment_9869" align="alignnone" width="254"]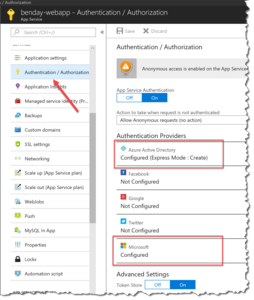 Multiple Azure App Service Authentication Providers[/caption]
Once you have that configured, your next thing is going to be to let your ASP.NET Core application know how to handle those multiple login providers. Each Easy Auth provider has its own authentication endpoints.
- Azure Active Directory (AAD) /.auth/login/aad
- Microsoft Accounts (MSA) /.auth/login/microsoftaccount
- Twitter /.auth/login/twitter
- Google /.auth/login/google
- Facebook /.auth/login/facebook
When the user for your ASP.NET Core app needs to log in, he or she is going to need to choose which provider they want to use and from there, you'll redirect them to the appropriate login page for the provider.
In the sample code for this blog post, these logins are configurable through appsettings.json. Set the config property for the providers you want to use to 'true' and publish your application.
{
  "Logging": {
    "IncludeScopes": false,
    "LogLevel": {
      "Default": "Warning"
    }
  },
  "SecuritySettings": {
    "DevelopmentMode": "false",
    "AzureActiveDirectory": "true",
    "MicrosoftAccount": "true",
    "Google": "false"
  }
}
When you go to the login page, you'll see the configured login provider options.
[caption id="attachment_9870" align="alignnone" width="300"]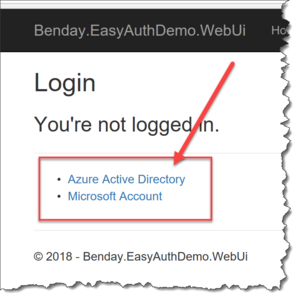 The login page shows you the configured authentication providers[/caption]
Development Mode Authentication Provider
In appsettings.json, there's also a security setting option for "development mode" authentication. This mode allows you to do authentication and authorization when you're not running your ASP.NET Core app inside of Azure. You want/need so that you can easy do development and debugging without having to deploy to Azure.
To enable development mode authentication, go to appsettings.json and set DevelopmentMode to "true".
{
  "Logging": {
    "IncludeScopes": false,
    "LogLevel": {
      "Default": "Warning"
    }
  },
  "SecuritySettings": {
    "DevelopmentMode": "true",
    "AzureActiveDirectory": "false",
    "MicrosoftAccount": "false",
    "Google": "false"
  }
}
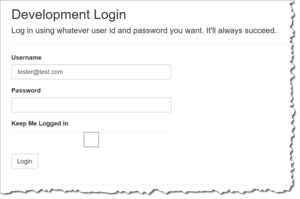
If development mode authentication is enabled, when you go to log in, you'll see a login page like the image below.
You can type in any username and password you want and the authentication provider will log you in.
Enabling / Disabling Authentication Provider Configurations in Azure
Considering how dangerous it would be to accidentally deploy development mode authentication in production, it's a good idea to use an Azure Web App configuration that's set in the portal rather than through appsettings.json. The configuration values you set in the portal will (by default) always override any values that are configured in your ASP.NET Core app.
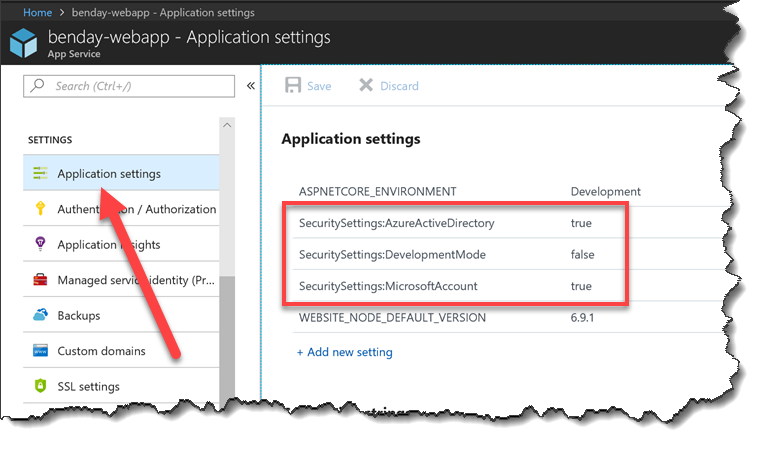
To set a configuration value, go to https://portal.azure.com and then go to your Web App's administration page. Then go to the Application settings section of the admin site. In the right panel, scroll down until you locate Application settings. The values in Application Settings will override the values in appsettings.json.
Definitely add a value that sets SecuritySettings:DevelopmentMode to false. This will ensure that development mode is always disabled in Azure. I'd also recommend setting your other providers here as well. In the image below, I've set SecuritySettings:AzureActiveDirectory to true and SecuritySettings:MicrosoftAccount to true in order to enable AAD and MSA accounts in the ASP.NET Core app.
Summary
This sample app lets you do multiple authentication providers for an ASP.NET Core app running in an Azure Web App with Azure App Authentication turned on. Here's a link to download the sample code.
I hope this helps you out.
-Ben
-- Need help with your Azure Web Apps or your overall Azure strategy? Want to do continuous integration and continuous deploy (CI/CD) with VSTS and Azure? Got sticky cloud security problems? Looking for someone to help your team build great cloud-based web apps? We can help. Drop us a line at info@benday.com.
