TL;DR: Azure App Services simplifies your life by taking care of security for you. This works great when your app is a web browser app but if you need to access it from a client API app (for example, a Universal Windows Platform app), life can get frustrating and confusing in an instant. In this post, I’ll show you how to work with the hidden security service endpoints that come along with your Azure App Service applications. Here's the code sample.
Why use Azure App Service Authorization and Authentication?
If you’ve been writing ASP.NET applications for years like me, you’re used to dealing with security code and security configuration. In an ASP.NET app (MVC, WebAPI, Web Forms), it’s just part of the code base.
But is that really such a super-hot idea? Isn’t that a violation of Separation of Concerns? Doesn’t that make the code kind of messy? If you need to integrate your security code with Microsoft Accounts or Google accounts or Facebook accounts or Azure Active Directory accounts, that code and configuration can get seriously messy.
Azure App Services has a pretty brilliant way of addressing this: make it part of the app service configuration and don’t make it part of the application code. Seriously. Just don’t worry about it in the ASP.NET application. Configure it in the App Service definition in the Azure Portal and go about your life. Basically, it’s authentication and authorization as a service. It’s slick.
Oh. But wait. Is your application an Web API application? Are you basically interacting with your app just through service calls and you don’t use a browser? Yahhhhhh…there’s a minor snag there. All this auth magic works great if you run in a browser but it’s a bit painful if you need to use it in a browser-less or “headless” configuration like service-to-service calls, a mobile application, or a Universal Windows Platform (UWP) application.
Configure Azure App Service Security to use Microsoft Accounts (MSAs)
Another great thing about using Azure App Service Authentication & Authorization is that it makes it very easy for you to integrate with and use user accounts from Azure Active Directory, Facebook, Google, Twitter, and Microsoft (MSA).
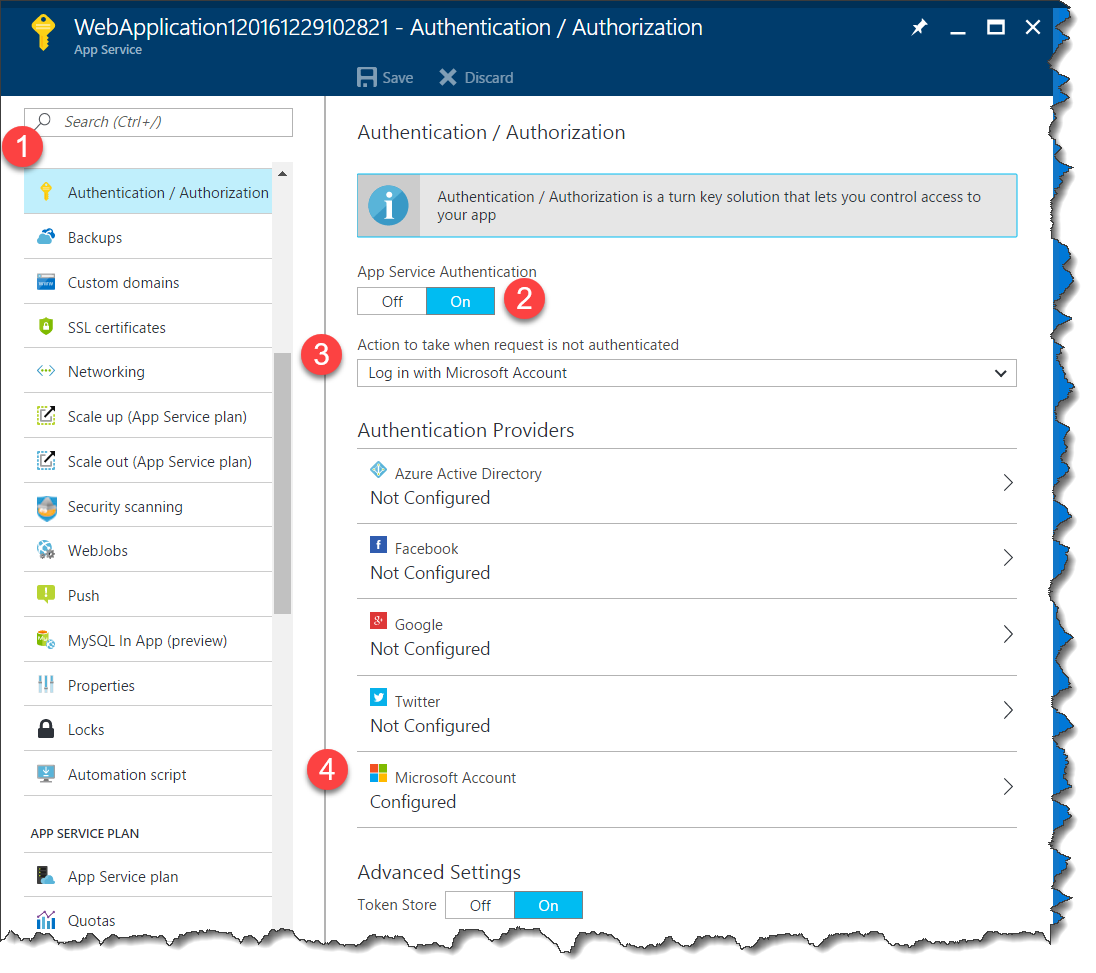
For example, to set up Microsoft Account logins using in your Azure App Service, open up http://portal.azure.com and navigate to your App Service. Then do the following (see screenshot below):
1. Click on Authentication / Authorization 2. Turn on App Service Authentication 3. Under Action to take when request is not authenticated, choose Log in with Microsoft Account 4. Click the Microsoft Account section to open the MSA settings
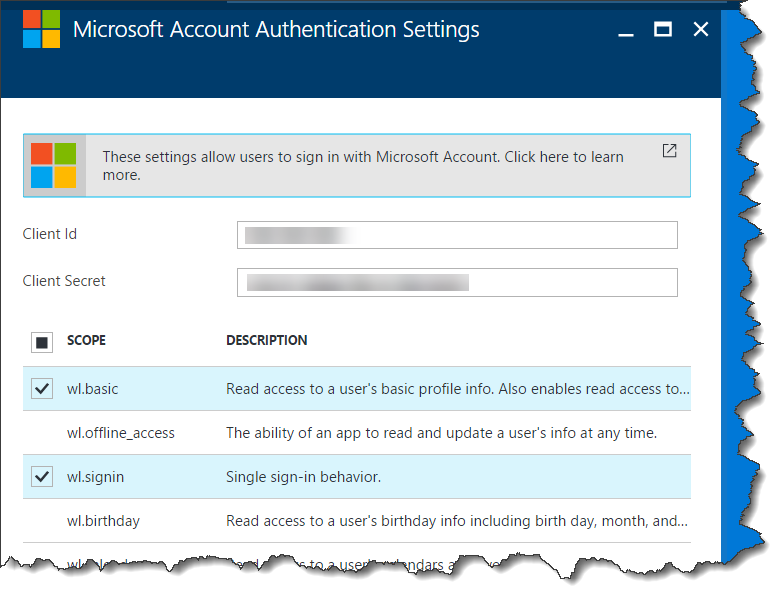
You should now see the Microsoft Account Authentication Settings page. This is where you’ll plug in the values that connect your App Service to your Microsoft Account application definition. You’ll create the application definition and get these values by going to https://apps.dev.microsoft.com. For more information on this and for exact walkthrough on it, check out this and this. , enter the values for Client Id and Client Secret, select wl.basic and wl.signin, then click OK. On the Authentication / Authorization blade, click Save.
That’s it. It’s done. It’s configured. Microsoft Accounts (MSAs) will now work against your application and you haven’t had to put *ANY* code into your app to make that work.
Azure API Applications & the ‘401 Not Authorized’ Problem
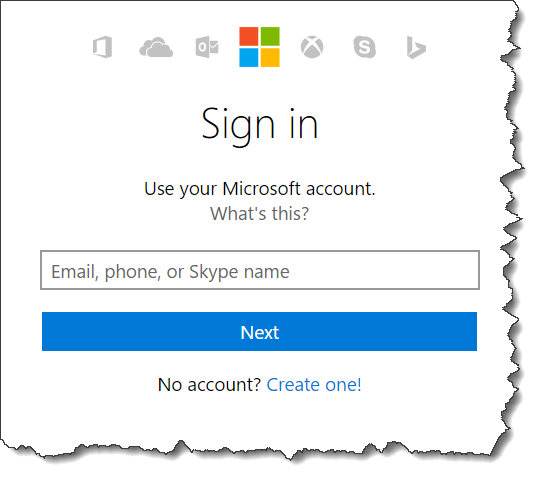
Ok. So you’ve got MSAs configured. At this point, whatever application you deploy into this Azure App Service will take advantage of this new security configuration. If someone hits your application and they’re not logged in, they’ll be prompted with the standard MSA web interface that’ll log them in.
Backing up a bit to think about what kind of Visual Studio project you’d create in order to work with your application, you’ve got a handful of different ways that Azure App Services thinking about your code: Web, API, Mobile, and Logic. If your app is intended to be run in a browser, then this MSA login screen is fine. If your app is an API app (Web API), you can just paste your service endpoint url into a browser and, if you’re not logged in, you’ll get the MSA login prompt.
But there’s a HUGE problem with that WebAPI login flow. You almost definitely ARE NOT going to be calling that service directly in a browser. Let’s say that you’re writing a mobile app or a Windows Universal Platform (UWP) app. You create an instance of HttpClient and make a GET call to your service endpoint. Your service call gets intercepted by the Azure App Service auth, it correctly decides that you’re not logged in and sends back an HTTP 401 Not Authorized error. And since this call wasn’t made using a browser, you don’t get prompted to log in and that’s it. HTTP 401. End of the line. Game over.
Login using Azure App Service’s Hidden Auth Endpoints
When I first hit this, I was staring at that HTTP 401 and I had almost zero idea about what to do next. So, there’s pretty much zero documentation on this but after a combination of beating my head against the wall for hours, scratching around on StackOverflow, watching network traffic traces, and about 16 hours of experimentation, I figured it out. It turns out that the way that Azure does this auth magic happens through a bunch of hidden service endpoints. All the calls that you make to your App Service can either use an auth cookie or an auth token. For API-based applications, you’ll almost definitely want to use tokens. (BTW, huge thanks for this thread on StackOverflow and to this blog post for providing the crucial clues for making the MSA stuff work.)
My first thought (and the cause of much frustration) was that I could take the token that I get from the Microsoft Account service and then just pass that to my App Service application. Answer: nope…not even close.
The important calls are:
- http://mywebappname.azurewebsites.net/.auth/me
- http://mywebappname.azurewebsites.net/.auth/login/microsoftaccount
- http://mywebappname.azurewebsites.net/.auth/refresh
/.auth/me returns information about who you are and whether you are currently logged in. /.auth/login/microsoftaccount takes your Microsoft Account token and turns it into a token for your application. /.auth/refresh refreshes your application token and extends the expiration period. The login service also has operations for user accounts from Azure Active Directory (/.auth/login/aad), Facebook (/.auth/login/facebook), Google (/.auth/login/google), and Twitter (/.auth/login/twitter).
Logging In & Accessing Your Services from C# & UWP
Getting a token that you can use to access your WebAPI application is a two step process and requires you to keep track of two different tokens: 1) your Microsoft Account token and 2) your App Service application token. Let’s say that you’re trying to make a call to “/api/Values/GetAll” in your application. The first thing that you’ll do is get your MSA token value. In a UWP application, you can do this using a combination of the AccountSettingsPane, WebAccountProvider, WebAuthenticationCoreManager, WebTokenRequest, and WebTokenRequestResult classes. Ultimately, you’ll make a call to WebAuthenticationManager.RequestTokenAsync() and get back an instance of WebTokenRequestResult. Your MSA token will be available to you on the result object in the “ResponseData[0].Token” property. Grab that token and stick it in a variable. (BTW, huge thanks to this blog post and this UWP sample for figuring out how to access the MSA token in a UWP app.)
WebTokenRequest webTokenRequest =
   new WebTokenRequest(Provider, Scope, ClientID);

WebTokenRequestResult webTokenRequestResult =
   await WebAuthenticationCoreManager.RequestTokenAsync(webTokenRequest);

if (webTokenRequestResult.ResponseStatus == WebTokenRequestStatus.Success)
 {
 ApplicationData.Current.LocalSettings.Values.Remove(
   _KeyNameForMicrosoftAccount);
 ApplicationData.Current.LocalSettings.Values.Remove(
   _KeyNameForMicrosoftAccountToken);

ApplicationData.Current.LocalSettings.Values[_KeyNameForMicrosoftAccount] =
   webTokenRequestResult.ResponseData[0].WebAccount.Id;

_MicrosoftAccountToken = webTokenRequestResult.ResponseData[0].Token;

SaveMicrosoftAccountToken(_MicrosoftAccountToken);
 }
Now that you’ve got your MSA token, you need to make a call to /.auth/login/microsoftaccount to get your application auth token. You’ll post your MSA token in a JSON body and put that token value in a JProperty named “access_token”. Your app service application auth token will come back to you on a JSON property named “authenticationToken”. Grab that app auth token and put that in a variable because you’ll be passing it to each call you make to your service.
using (var client = new HttpClient())
 {
 client.BaseAddress = _BaseUri;

var jsonToPost = new JObject(
 new JProperty("access_token", _MicrosoftAccountToken));

var contentToPost = new StringContent(
 JsonConvert.SerializeObject(jsonToPost),
 Encoding.UTF8, "application/json");
 var asyncResult = await client.PostAsync(
 "/.auth/login/microsoftaccount",
 contentToPost);

if (asyncResult.Content == null)
 {
 throw new InvalidOperationException("Result from call was null.");
 }
 else
 {
 var resultContentAsString = asyncResult.Content.AsString();

var converter = new ExpandoObjectConverter();
 dynamic responseContentAsObject = JsonConvert.DeserializeObject<ExpandoObject>(
 resultContentAsString, converter);

_ApplicationToken = responseContentAsObject.authenticationToken;
 }
 }
Now that you have your app auth token, you’re ready to make calls to your actual service and by passing your app auth token with each request, you avoid the 401 – Not Authenticated problem. Since you’re going to be doing the same setup for each call you make to your service, I’d recommend creating a utility method that create instances of HttpClient and initializes it with app auth token. You attach that app auth token to the HttpClient by adding a value to the DefaultRequestHeaders collection named “x-zumo-auth” with the token value.
public async Task<HttpClient> GetClientForApplicationServiceCall()
 {
 if (_ApplicationToken == null)
 {
 await GetApplicationToken();
 }

var client = new HttpClient();

client.DefaultRequestHeaders.Add("x-zumo-auth", _ApplicationToken);

return client;
 }
Once you’ve got that HttpClient initialized with the x-zumo-auth header and your app auth token, you’re ready to make the call to your services.
public async Task<string> GetStringFromApplicationService(string url)
 {
 using (var client = await GetClientForApplicationServiceCall())
 {
 return await client.GetStringAsync(url);
 }
 }
Sample Code & Summary
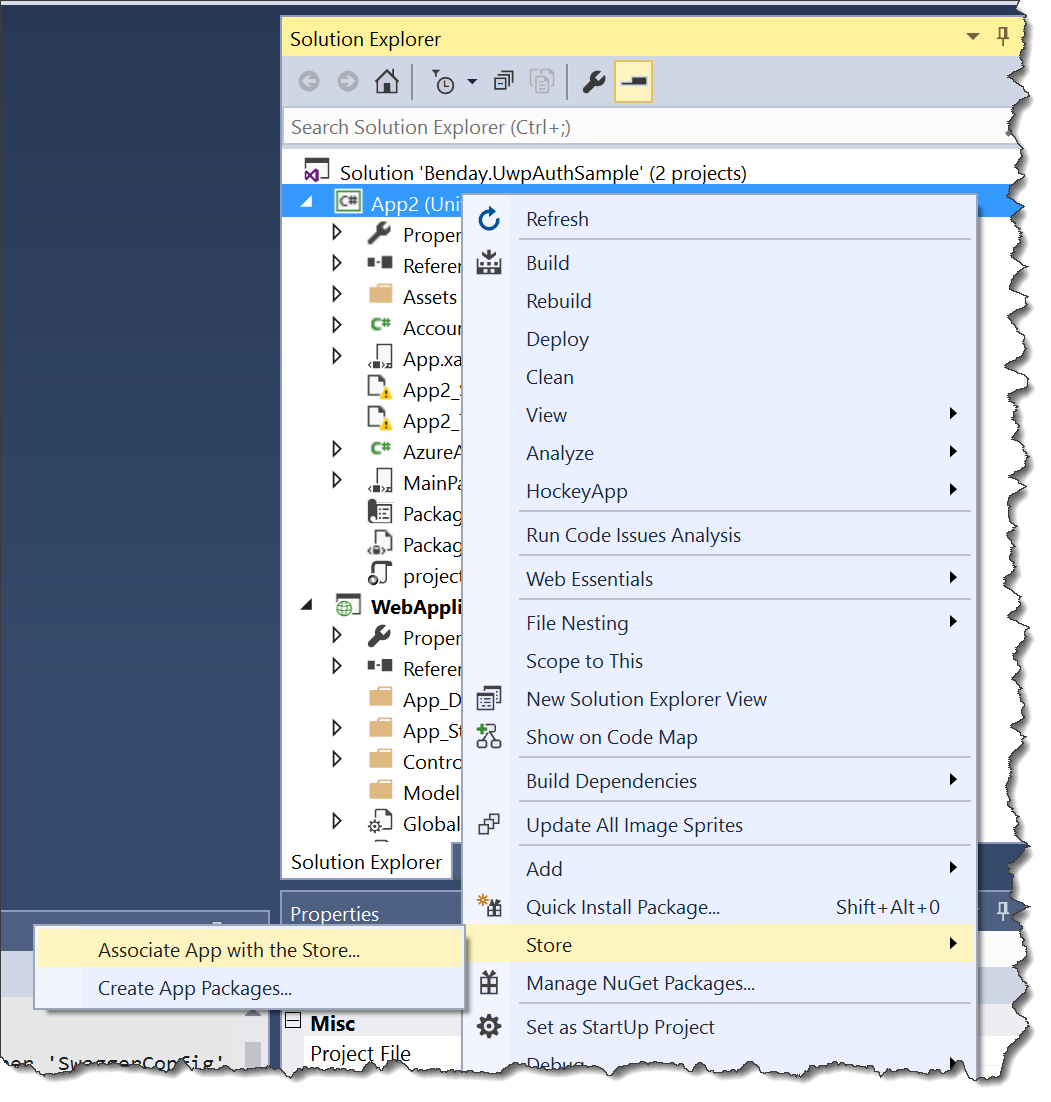
If you want the full code sample, you can download the source code from here. To make the UWP application work, be sure to right-click on the project and then go to the Store menu and choose Associate App with the Store. This associates the code with a UWP app definition in your account. It’s quick and easy and if you don’t do this, you’ll almost definitely get weird errors when you try to access your MSA token. You’ll also need to deploy the “WebApplication1” project to your Azure App Service and then modify the base URL value in MainPage.xaml.cs.
So. That’s a lot of stuff to think about and cover but I hope that this helps out.
-Ben
-- Still confused? Need some help making this Azure App Service thing work for you? Need help with Universal Windows Platform (UWP) apps? What about DevOps, Scrum, and TFS? We can help. Drop us a line at info@benday.com.


