Like a lot of people in the Microsoft world, I'm still working to *really* wrap my brain around Git. I've been using centralized version control systems like SourceSafe and Team Foundation Server Version Control (TFVC) for my entire career. Centralized version control is what I know and it's what makes sense to me. When you have a version control repository that represents all the code in your enterprise and you're "folder-centric", you organize your code in a certain way and you don't worry too much about size.
Well, in the Git/DVCS mindset, you think differently about how you organize your code and your source control structures. Here's a tip: in Git, you definitely *don't* have one giant source control repository for your enterprise. Instead, you'll probably do something more akin to 1 Git repo per Visual Studio Solution (*.sln). The reason why is that when you "clone" a Git repository, you're not just bringing down the latest version of the code -- you're bringing down every check-in ("commit") that was ever made in every branch in the source repository. Yah. That can get kind of big. That's a lot of data to move around your network and to store on your machine(s). So, if you were to work in the "one source repository for the whole enterprise" mindset, you'd pretty quickly have Git repos that were in the multi-gigabyte range. That's way too big and you don't want that.
When you create a Team Foundation Server (TFS) Team Project that uses Git, it automatically creates a default Git repository ("repo") for you. Huh. So does that mean that if you use Git+TFS that you're supposed to use Git in the "wrong", old-school, one-repo-per-enterprise way? The answer is no. It's a little bit hidden but you can create multiple Git Repos per TFS Team Project.
Here's how you do it.
1. Open a browser and navigate to the home page for your Git-based team project in TFS
2. From the menu, click on the Code hub as shown below.
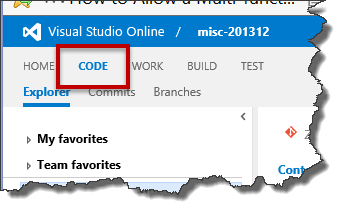
You should now be in the code/source control explorer window.
3. In the right-hand panel, you'll see the name of the current Git repository.
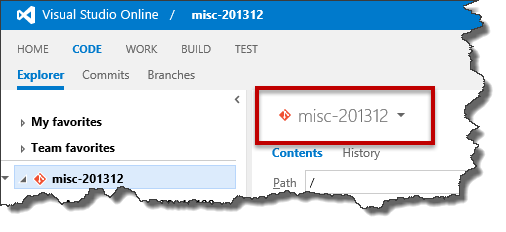
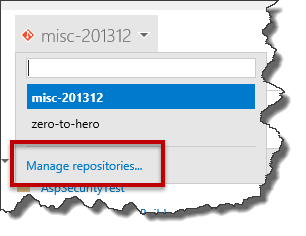
4. Click the "drop down" icon next to the name of the repository to show the repository details. In this drop down list, you'll see the list of all the Git repos for your Team Project and at the bottom of this list you'll see a link that says "Manage repositories...". Click the Manage Repositories link.
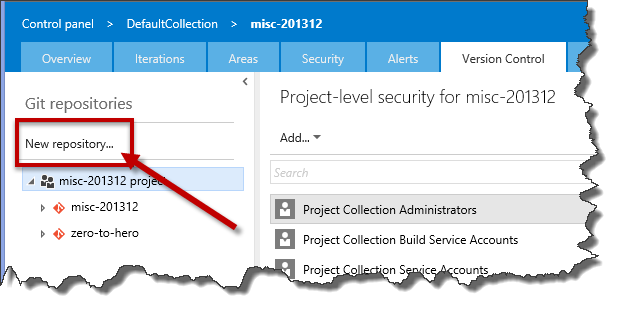
5. You should now see the Version Control control panel for your Team Project. In the left panel, there's a button that says "New repository...". As you can probably guess, this lets you create a new, additional Git repository for your Team Project. Click the "New repository..." button.
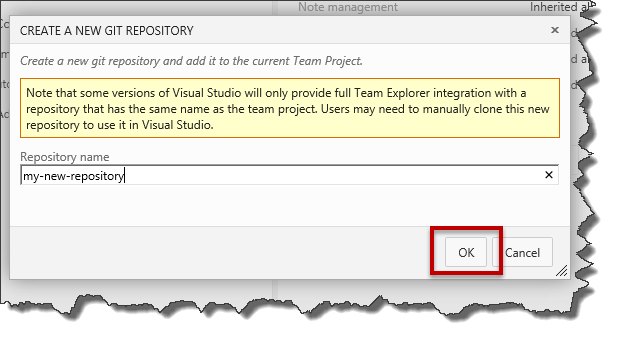
6. You'll see a dialog with the title "Create a New Git Repository". Enter the name of the new repository in the Repository name textbox and click the OK button.
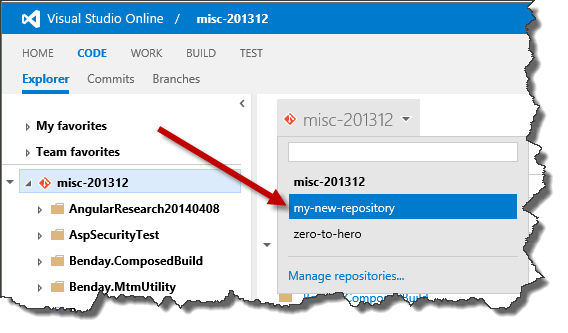
7. Go back to the Code hub's source control explorer window. Refresh the web page by clicking your browser's refresh button. Now when you pull the repos drop down menu, you'll see your new Git repository. Choose the new repository from the drop down menu.
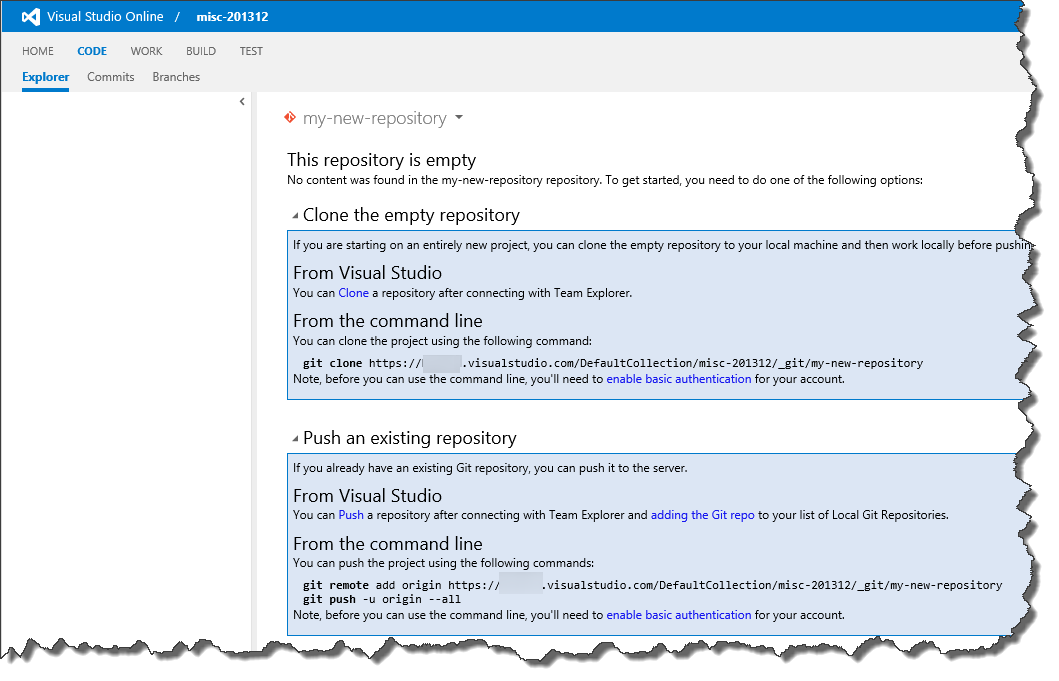
8. You should now see the information about your new empty Git repository along with directions on how to clone this new Git repo to your local machine or to push an existing repository.
And that's it. You've created an additional Git repository for your TFS Team Project or Visual Studio Online (VSO) Team Project.
-Ben
-- Looking for help wrapping your head around Git? Need some assistance migrating your TFVC source repository into Git? Want some advice on how to use TFS Builds with Git? We can help. Drop us a line at info@benday.com.


