Are you a big user of the SQL Server database projects? You know…what used to be known as ”data dude”? Did you get way into doing command line deployments of your databases using vsdbcmd.exe? Well, if you are one of those developers and you’ve upgraded to the latest version of the SQL Server Database Projects, then you might be wondering just where vsdbcmd.exe went.
Answer: vsdbcmd.exe has been replaced with SqlPackage.exe.
There were a lot of updates for the VS2012 version of the SQL Server Database Projects so it makes sense that vsdbcmd would get tweeked, too. Especially, since the outputs of database projects have completely changed. (Goodbye, *.dbschema files. Hello, *.dacpac.)
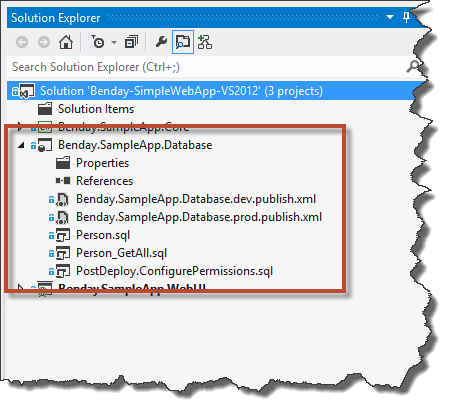
For this blog post, let’s assume a very simple SQL Server Database Project called Benday.SampleApp.Database (as shown in Figure 1) that, upon “compile”, generates a dacpac file named “Benday.SampleApp.Database.dacpac”.
Figure 1 – The database project
Thankfully, IMHO, SqlPackage.exe is about a trillion times easier to work with. If I wanted to deploy this database to an instance of SQL Server named demo2012util, here’s what my command line syntax would be:
SqlPackage /Action:Publish
/SourceFile:"Benday.SampleApp.Database.dacpac"
/TargetDatabaseName:BendaySampleAppDb
/TargetServerName:"demo2012util"
Pretty easy, right? Set the /Action to Publish. Specify the /SourceFile and point it to the *.dacpac. Tell it what to name the database using /TargetDatabaseName. Give it the /TargetServerName for the SQL Server instance. Done.
You can make this even easier if you add a “Publish Database” profile to your project. In Figure 2, you can see the two profiles that I created – one for the “dev” environment named Benday.SampleApp.Database.dev.publish.xml and one for the “prod” environment named Benday.SampleApp.Database.prod.publish.xml. These files contain all the configuration values that you’d use to deploy a SQL Server dacpac into a particular environment.
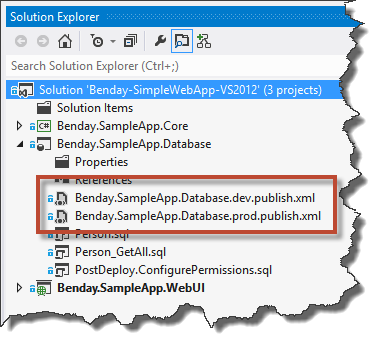
Figure 2 – The “Publish Database” profiles in the SQL Server Database Project
Since the profile (*.publish.xml) file has all the config values, when you go to deploy the database from the command line using SqlPackage.exe, you don’t have to supply the /TargetDatabaseName or the /TargetServerName anymore and instead you just provide the path to the dacpac using /SourceFile and then specify the profile using the /Profile argument.
Here’s what that command would look like:
SqlPackage
/Action:Publish
/SourceFile:"Benday.SampleApp.Database.dacpac"
/Profile:"Benday.SampleApp.Database.prod.publish.xml"
At this point, you’re probably sarcastically thinking “WHOOPTEEDOOO!!! I’ve exchanged 4 command line arguments for 3 command line arguments! Think of all the extra free time I’ll have now! Thanks, Ben!” If your deployment arguments are as simple as server instance and database name then yah…not that impressive. But there are a lot more configuration options available to you on the command line and typing/managing all those values will definitely be an annoying and error-prone process.
Just for giggles, try double-clicking on one of those *.publish.xml files. You should see the Publish Database dialog for that deployment profile as shown in Figure 3. This dialog lets you set the target database connection and the database name.

Figure 3 – The Publish Database editor dialog
Impressed yet? Not really? Ok. Click the Advanced button. KA-POWWWWWW! Aw snap! You’ve just been pwned! Or whatever the cool kids say in order to indicate that something kinda awesome just happened up. I’m pretty solidly lame. Cut me some slack already. Granddad’s tired. (I’m 38. Practically a senior citizen in the development world.)
ANYWAY! You should now see the Advanced Publish Settings dialog and it should look something like Figure 4. There are a TON of settings that you can…uhmmm…set for your database deployments.

Figure 4 – The Advanced Publish Settings editor dialog
As these settings get complex, it becomes more and more important that these settings aren’t left up to chance and are under version control just like everything else. One of the biggest time savers when it comes to deploying code and databases is having a well-known automated way to deploy where all your config settings are scripted out. If it’s scripted, it’s easy. If it’s under version control, it’s traceable.
Create Your First Database Publish Profile
Ok. How do I create this profile?
Step 1: Right-click the database project and choose Publish (Figure 5)
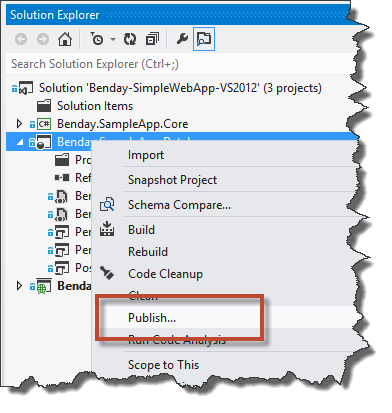
Figure 5 – Right-click the database project and choose publish from the context menu
Step 2: Populate the values for your settings and click the Create button (Figure 6)

Figure 6 – Enter your settings and click Create Profile
After you click Create Profile, you should see a new *.publish.xml file in your project (Figure 7).
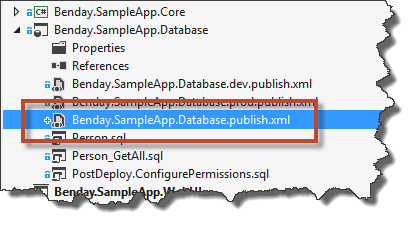
Figure 7 – The new deployment profile
Step 3: This step is optional but I think it’s handy. Change the “Copy to Output Directory” setting on the new *.publish.xml file to “Copy Always” (Figure 8). This ensures that when the project is compiled (via the Build command) that the publish profile is copied to the bin directory along with the *.dacpac file. This makes scripting the deploy using SqlPackage.exe easier when you’re deploying from a developer machine and MUCH easier if you’re deploying from an automated build.
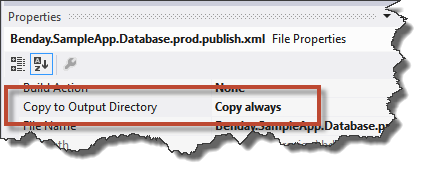
Figure 8 – Set the Copy to Output Directory to Copy Always
I hope this is helpful and/or useful.
-Ben
-- Want to streamline your database and binary deployment process? Looking for suggestions on how to make all this run smoothly from Team Foundation Server’s automated build? Thinking it might be nice to get some training on how to put your insanely complex database under source control using SQL Server Database Projects? Drop us a line at info@benday.com.
